 |
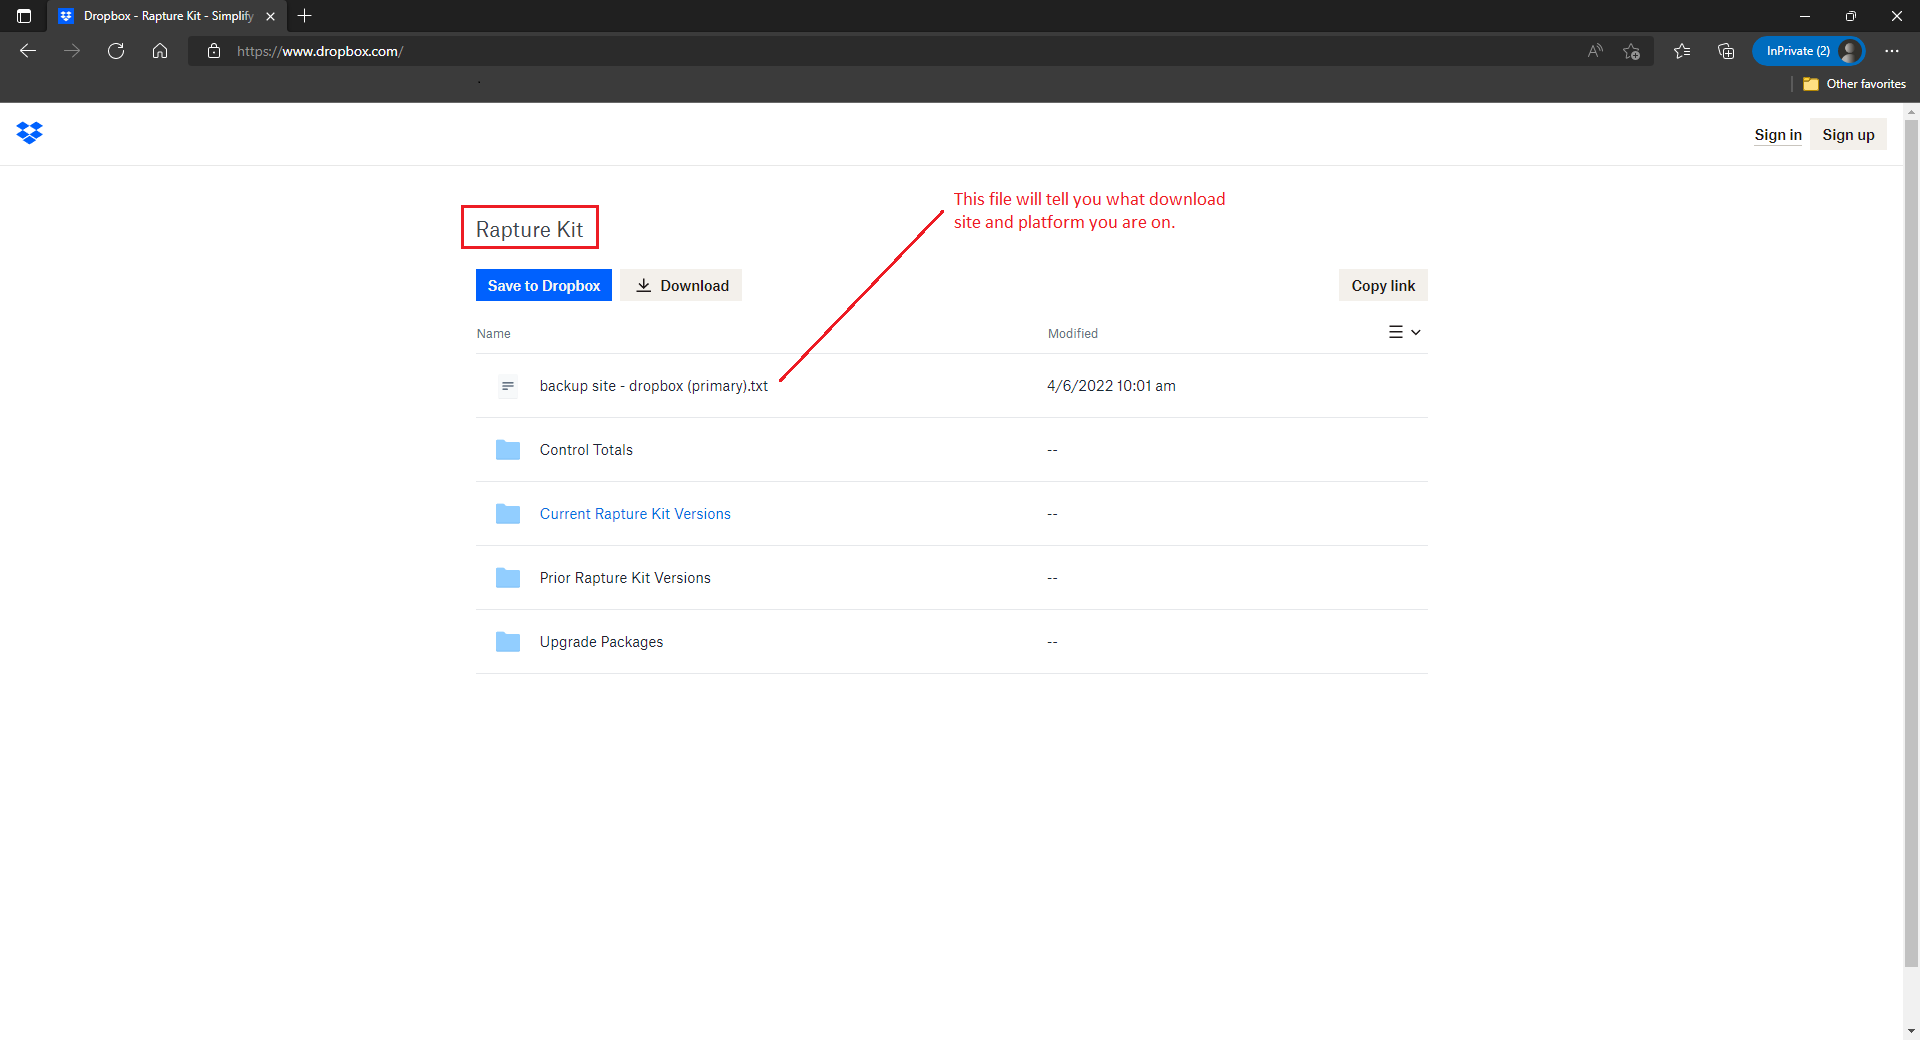
To begin downloading a full Rapture Kit current version 2.1 click on the “Current Rapture Kit Versions” link. |
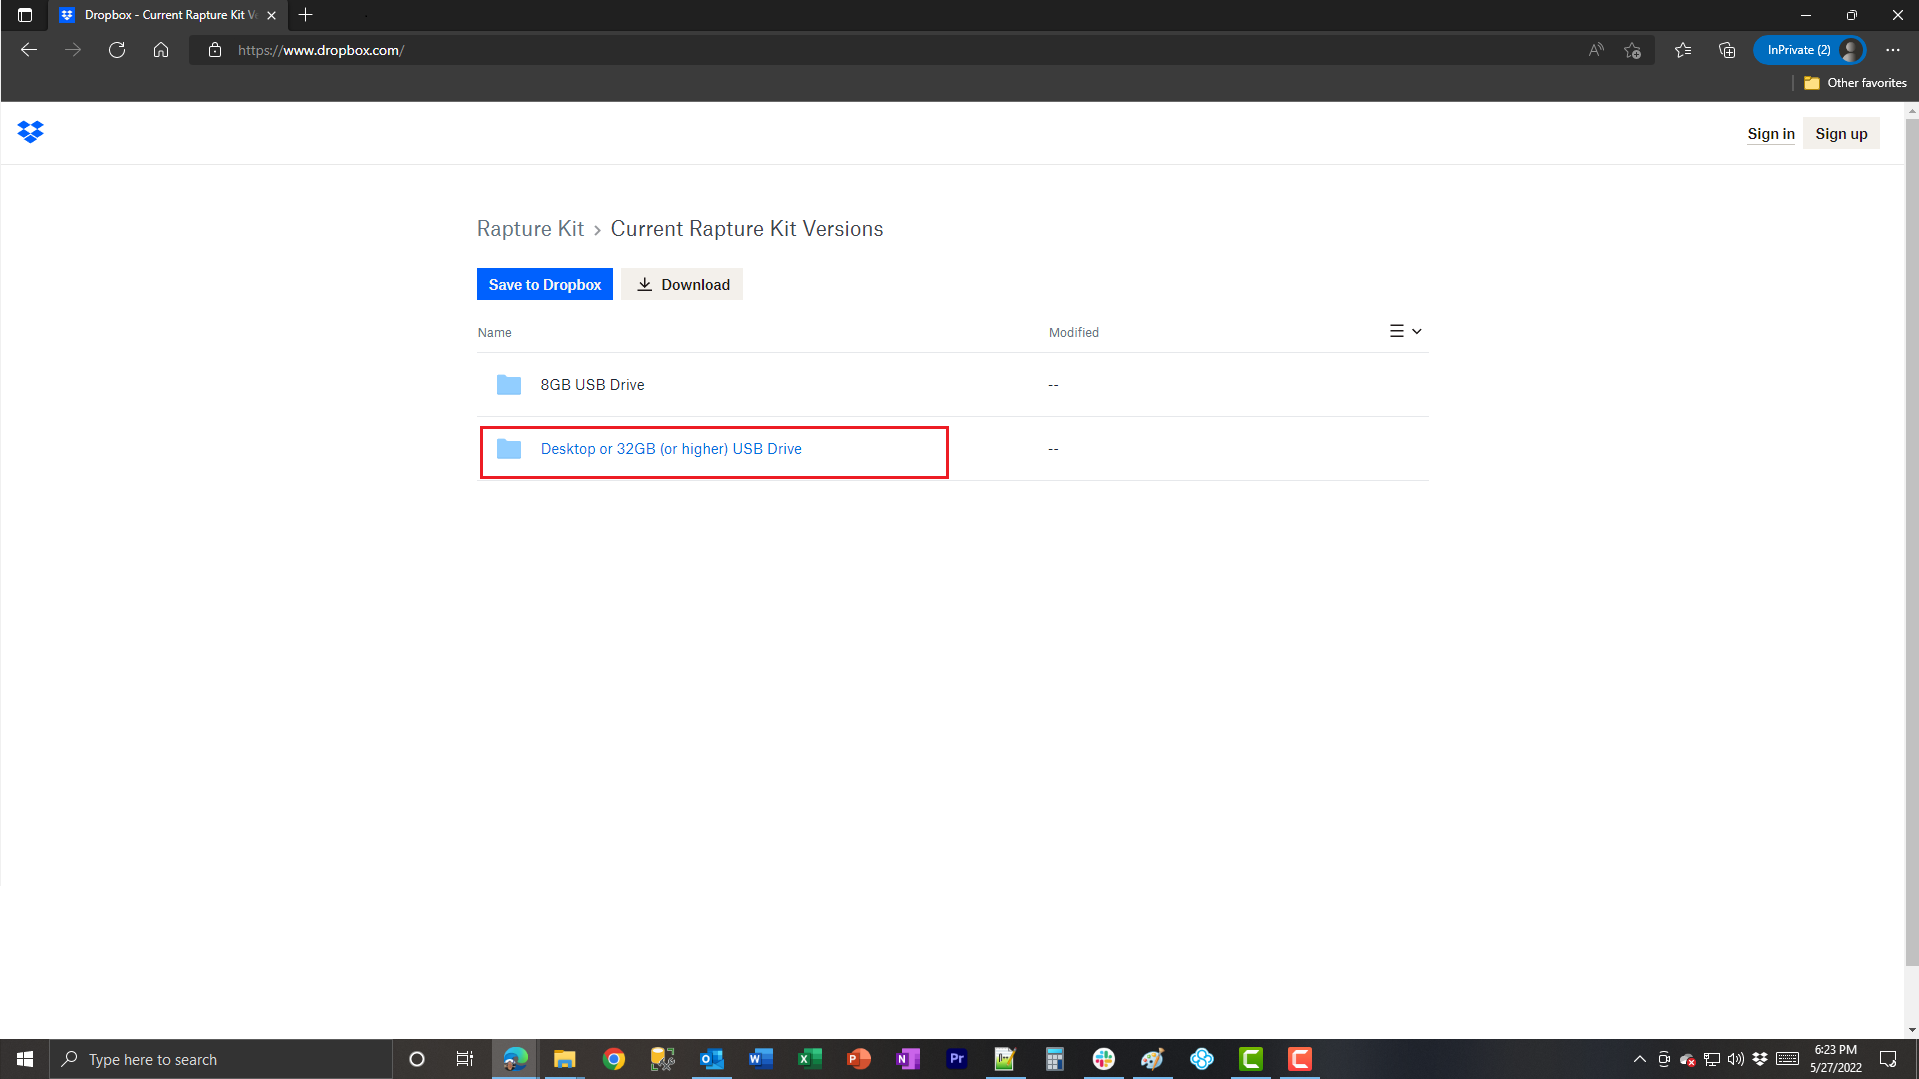 |
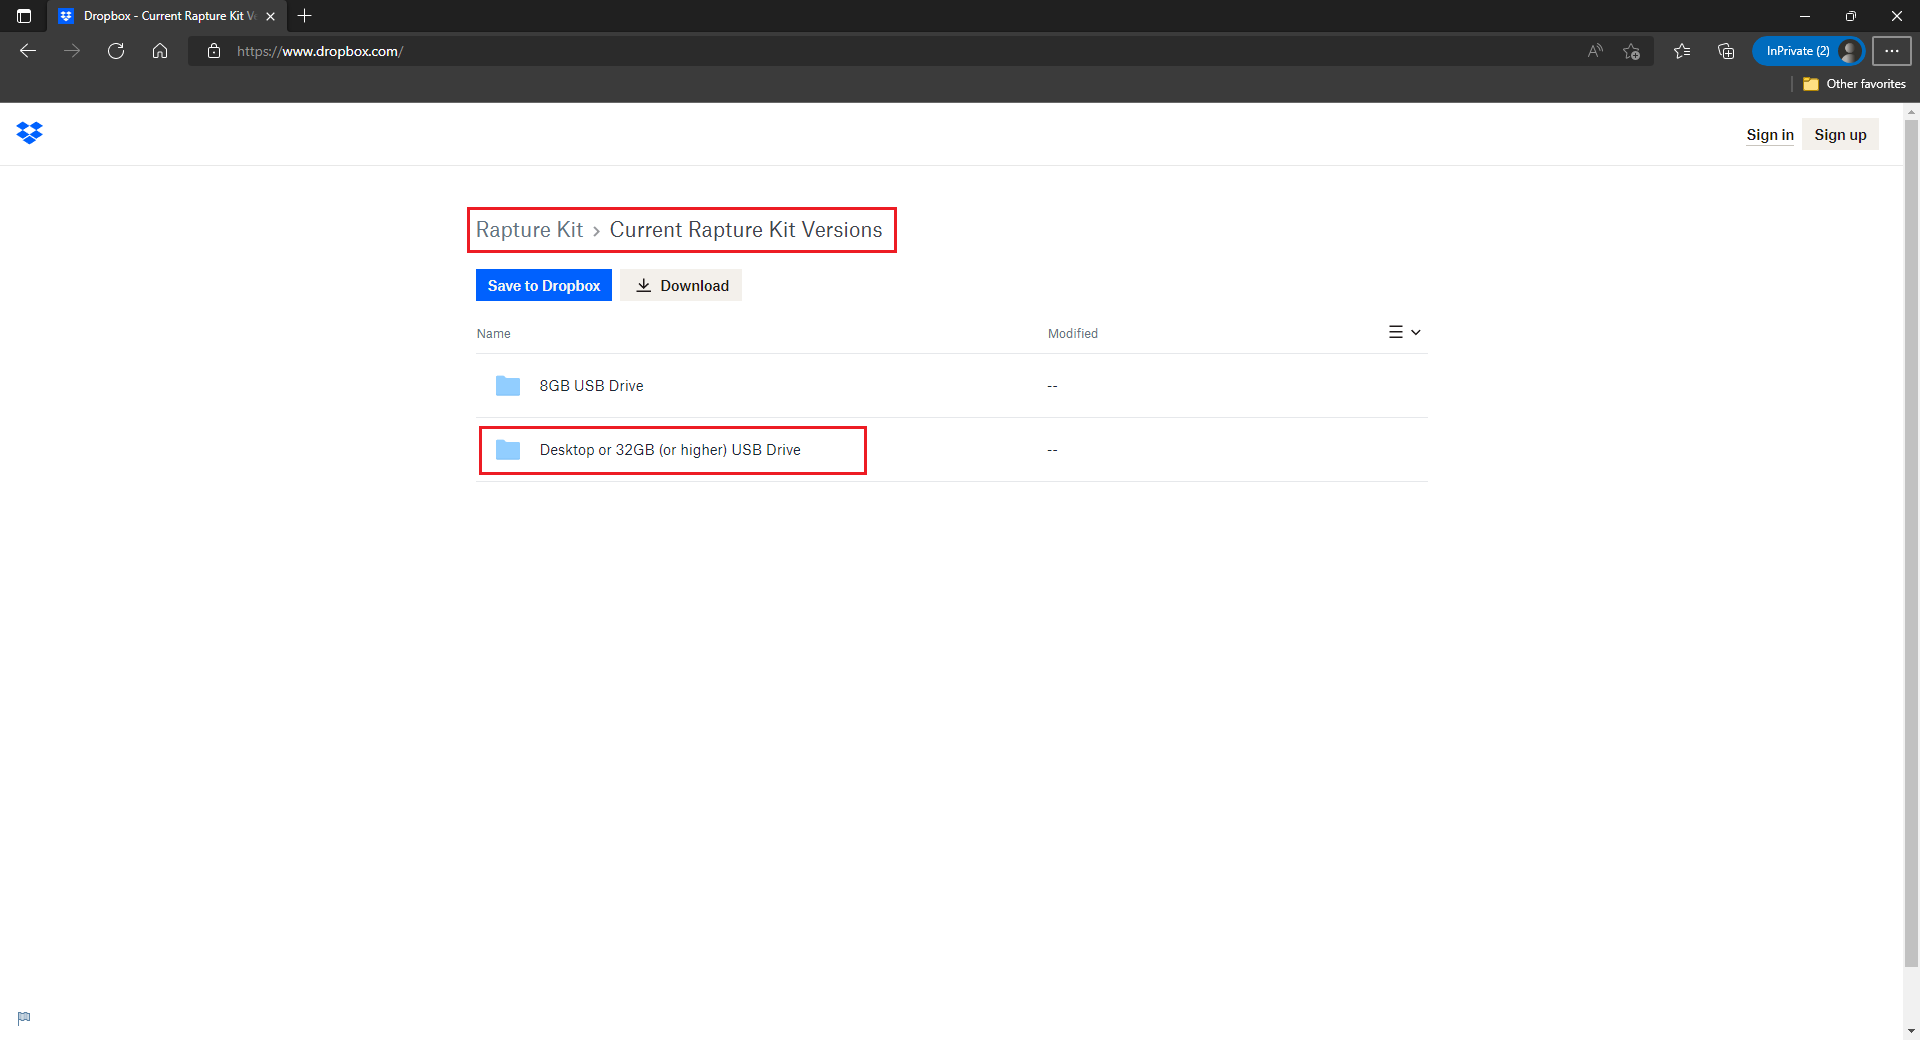
Click on the “Desktop or 32GB (or higher) USB Drive” folder link. |
 |
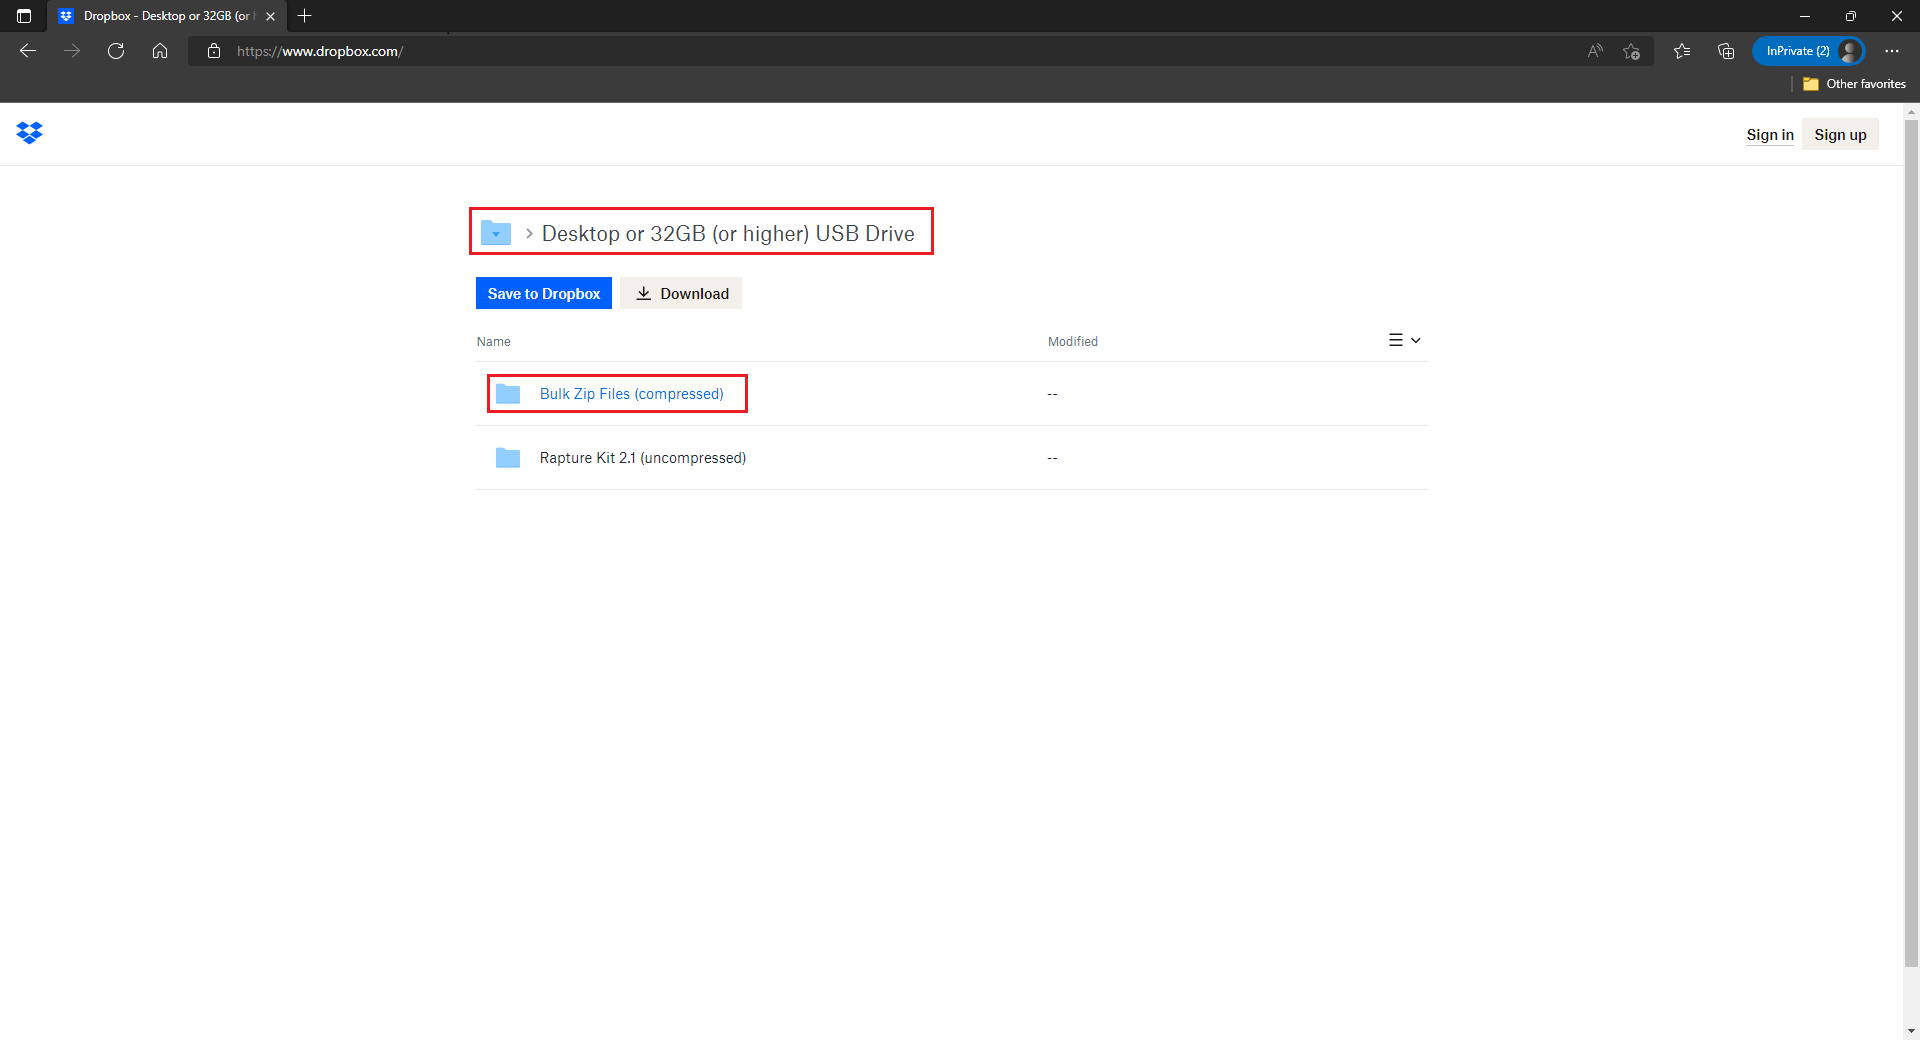
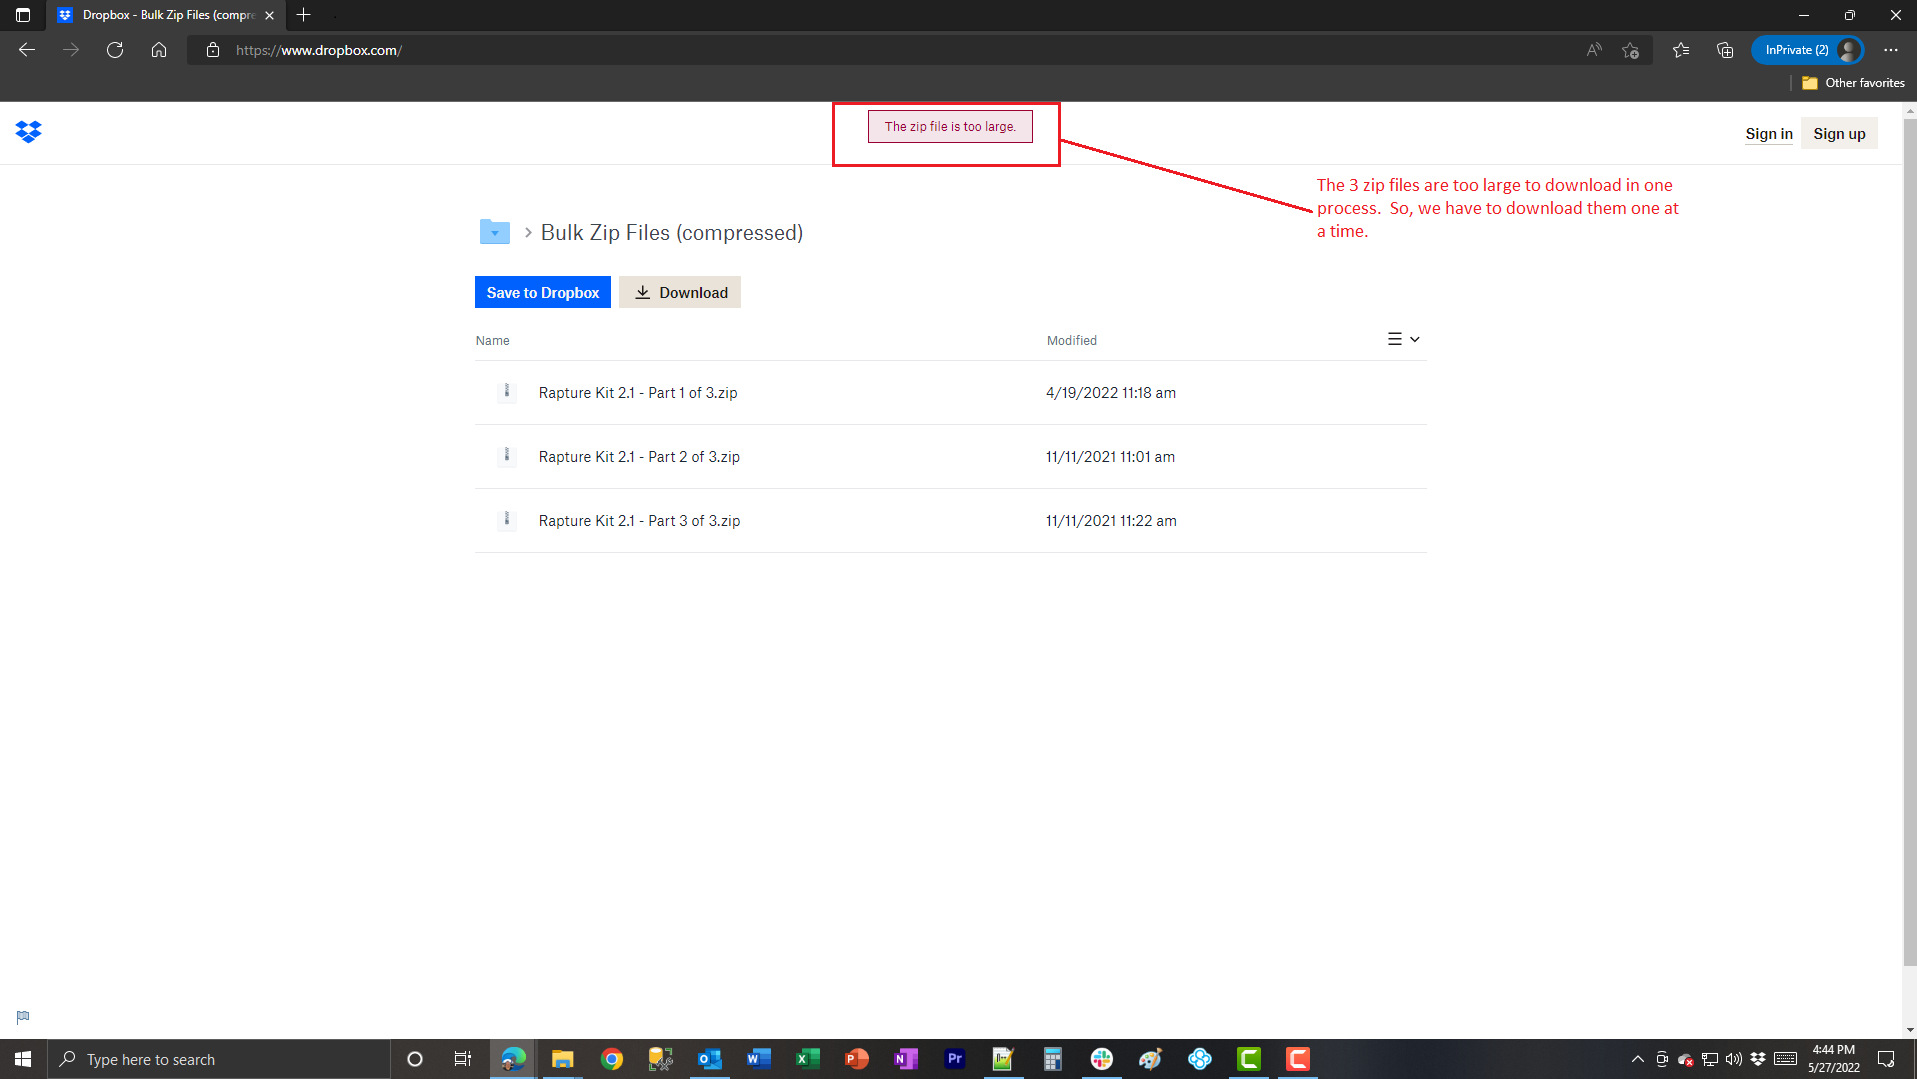
To access the uncompressed content, click on “Rapture Kit 2.1 (uncompressed)” link. |
 |
What you are looking at is the folder structure of Rapture Kit 2.1 in its uncompressed state. This is the same structure that will be recreated on your PC or Mac and is also the structure that will end up on any USB Drive that you make after the fact. Click on the “Download” button in gray. |
 |
We’ve seen this message from the Zip File method (see above). What it means is that the sum of all the files cannot be put into a single Zip file. That’s okay, we are going to download each folder one at a time. Before we do however, let’s download the “_Read Me First.pdf” file by clicking that link. |
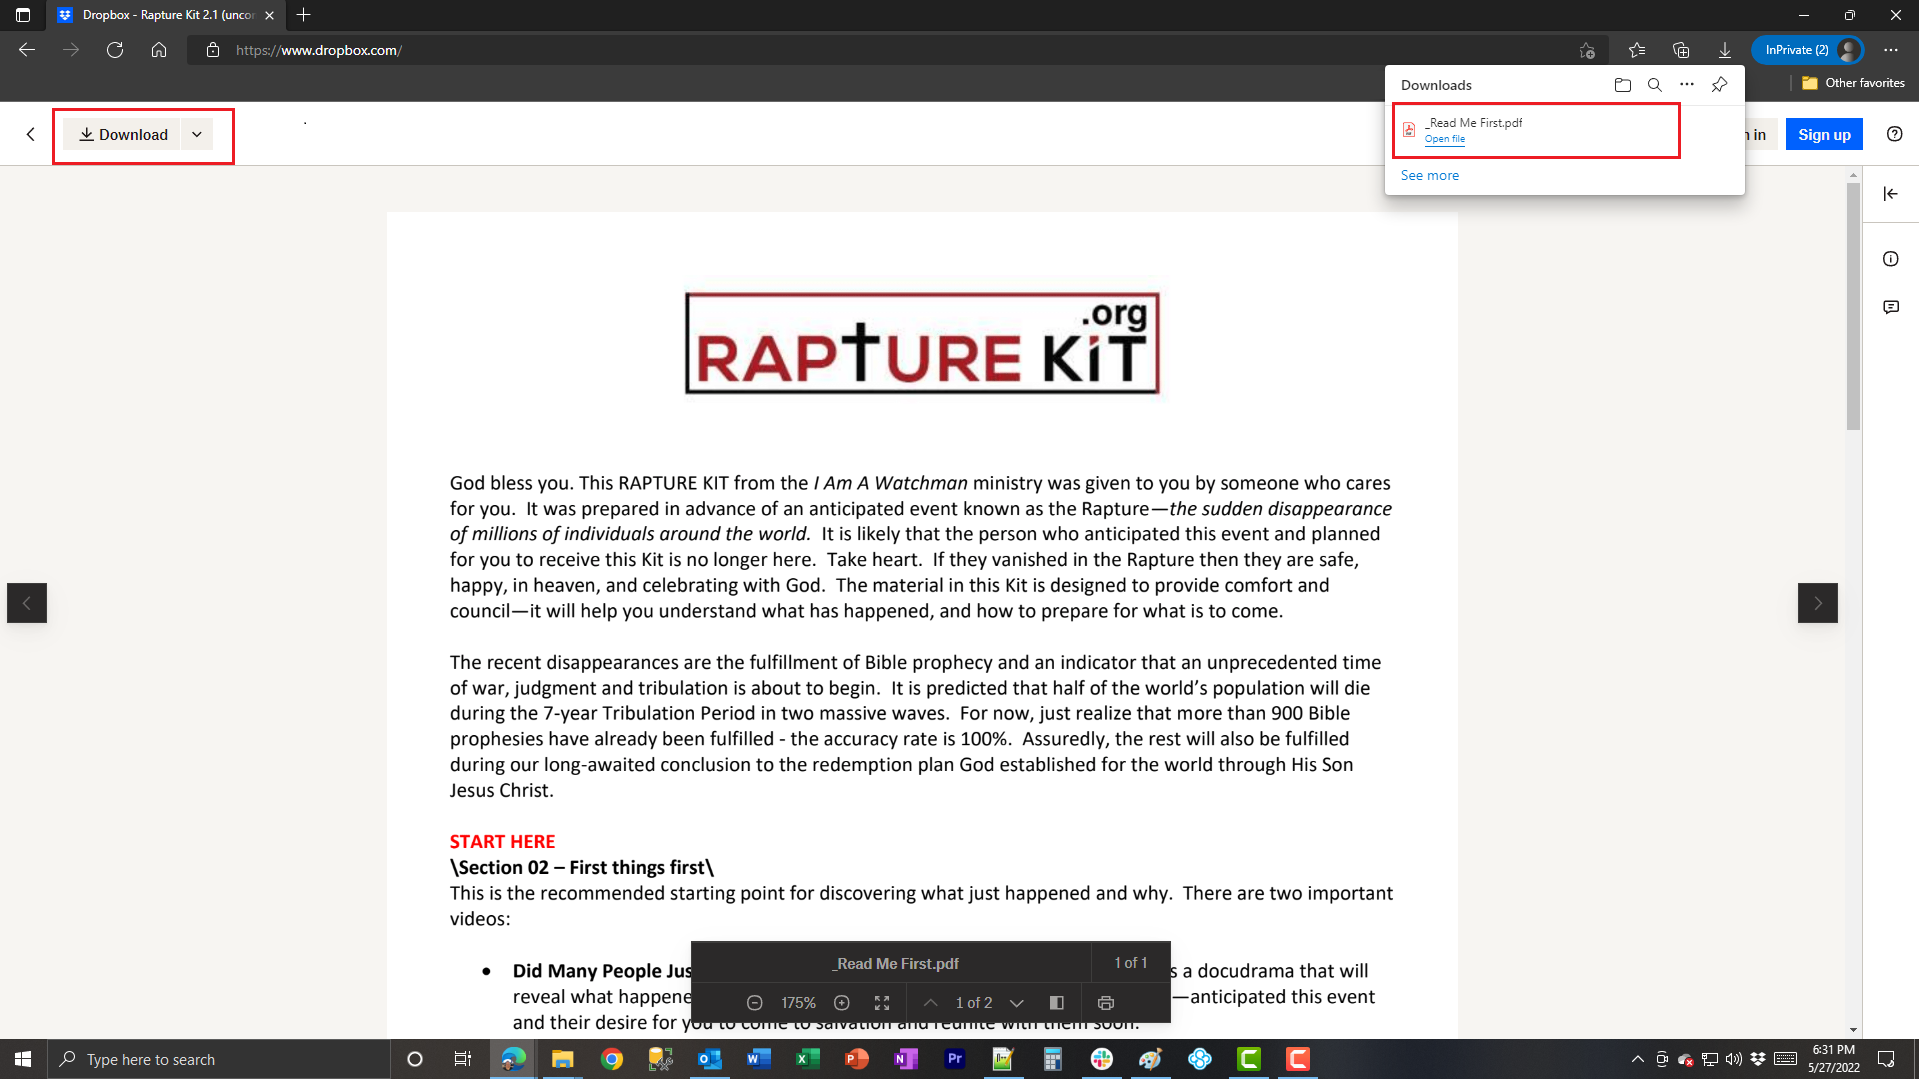 |
Because Dropbox recognizes a PDF document, which this is, it has the ability to preview it. What you want to do is hit the “Download” button on the top left of the page. Note the progress bar on the upper right completes very quickly comparatively speaking. |
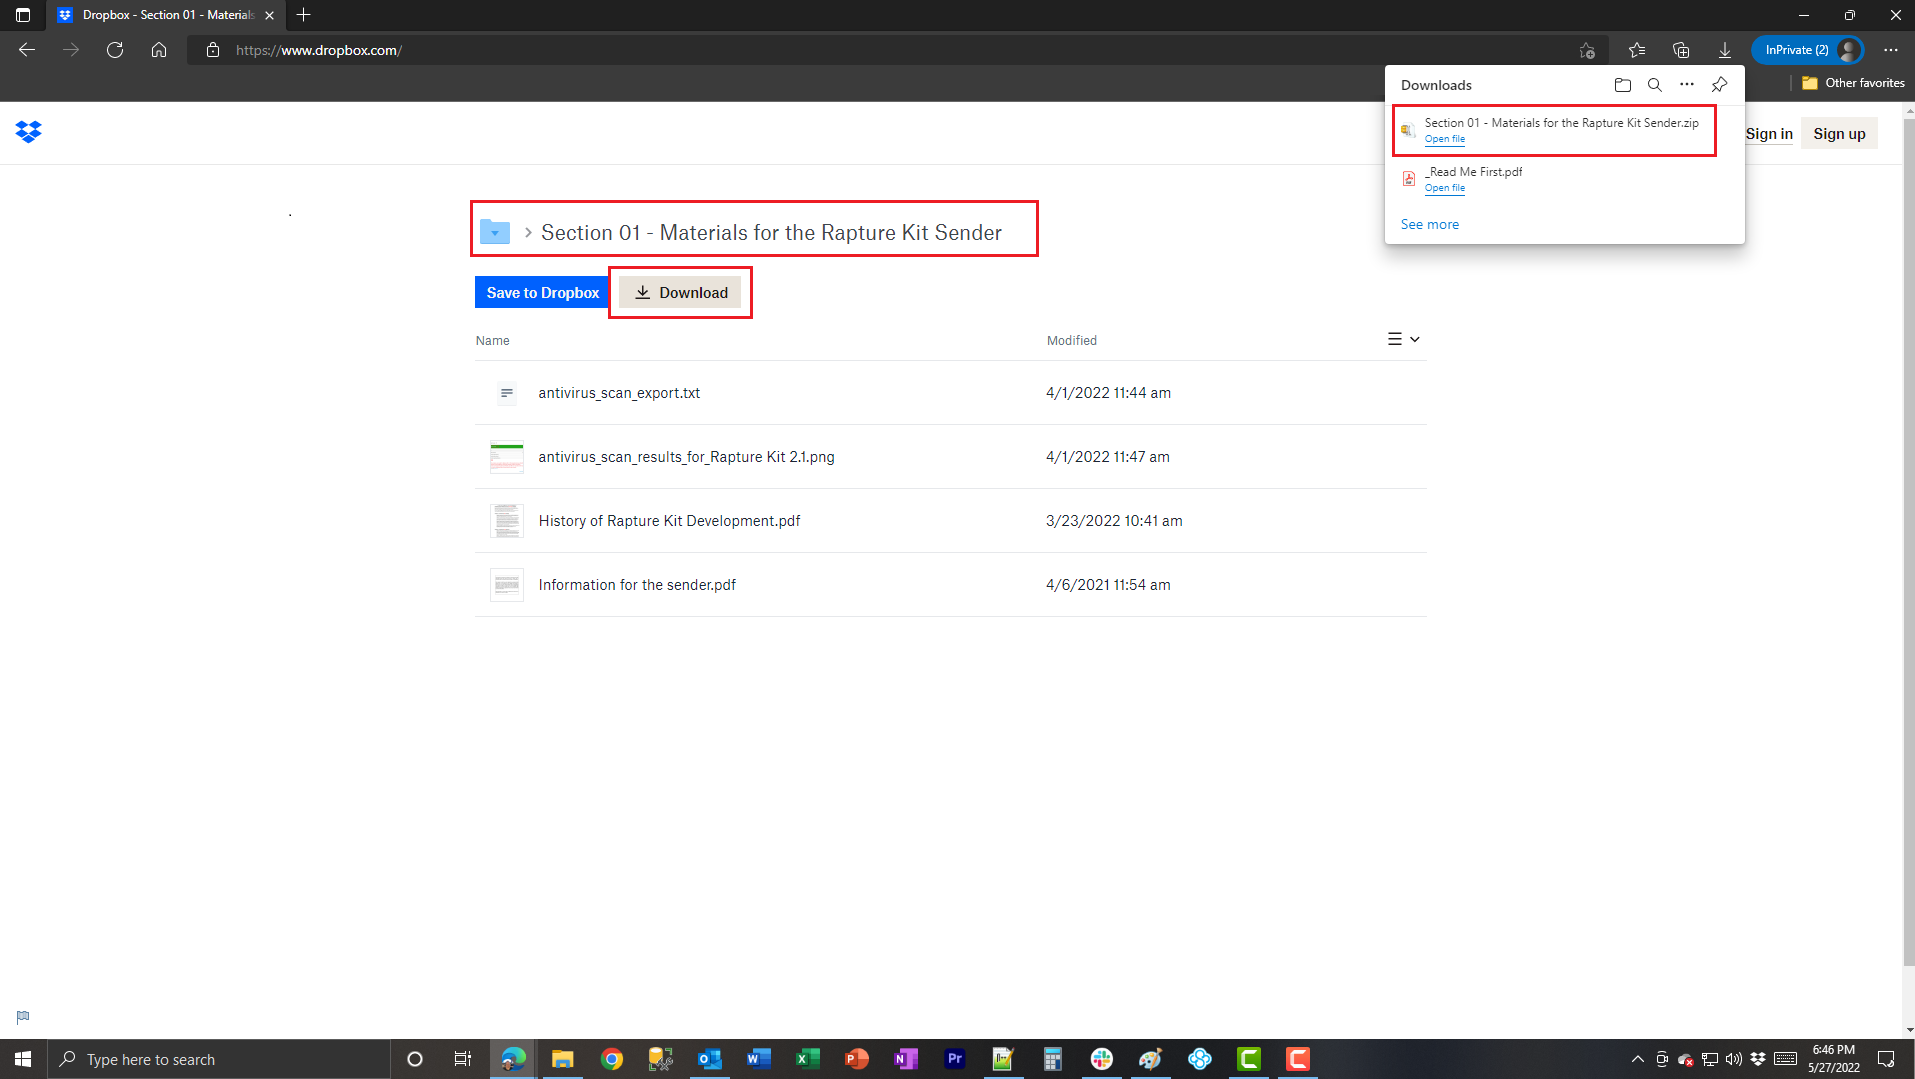 |
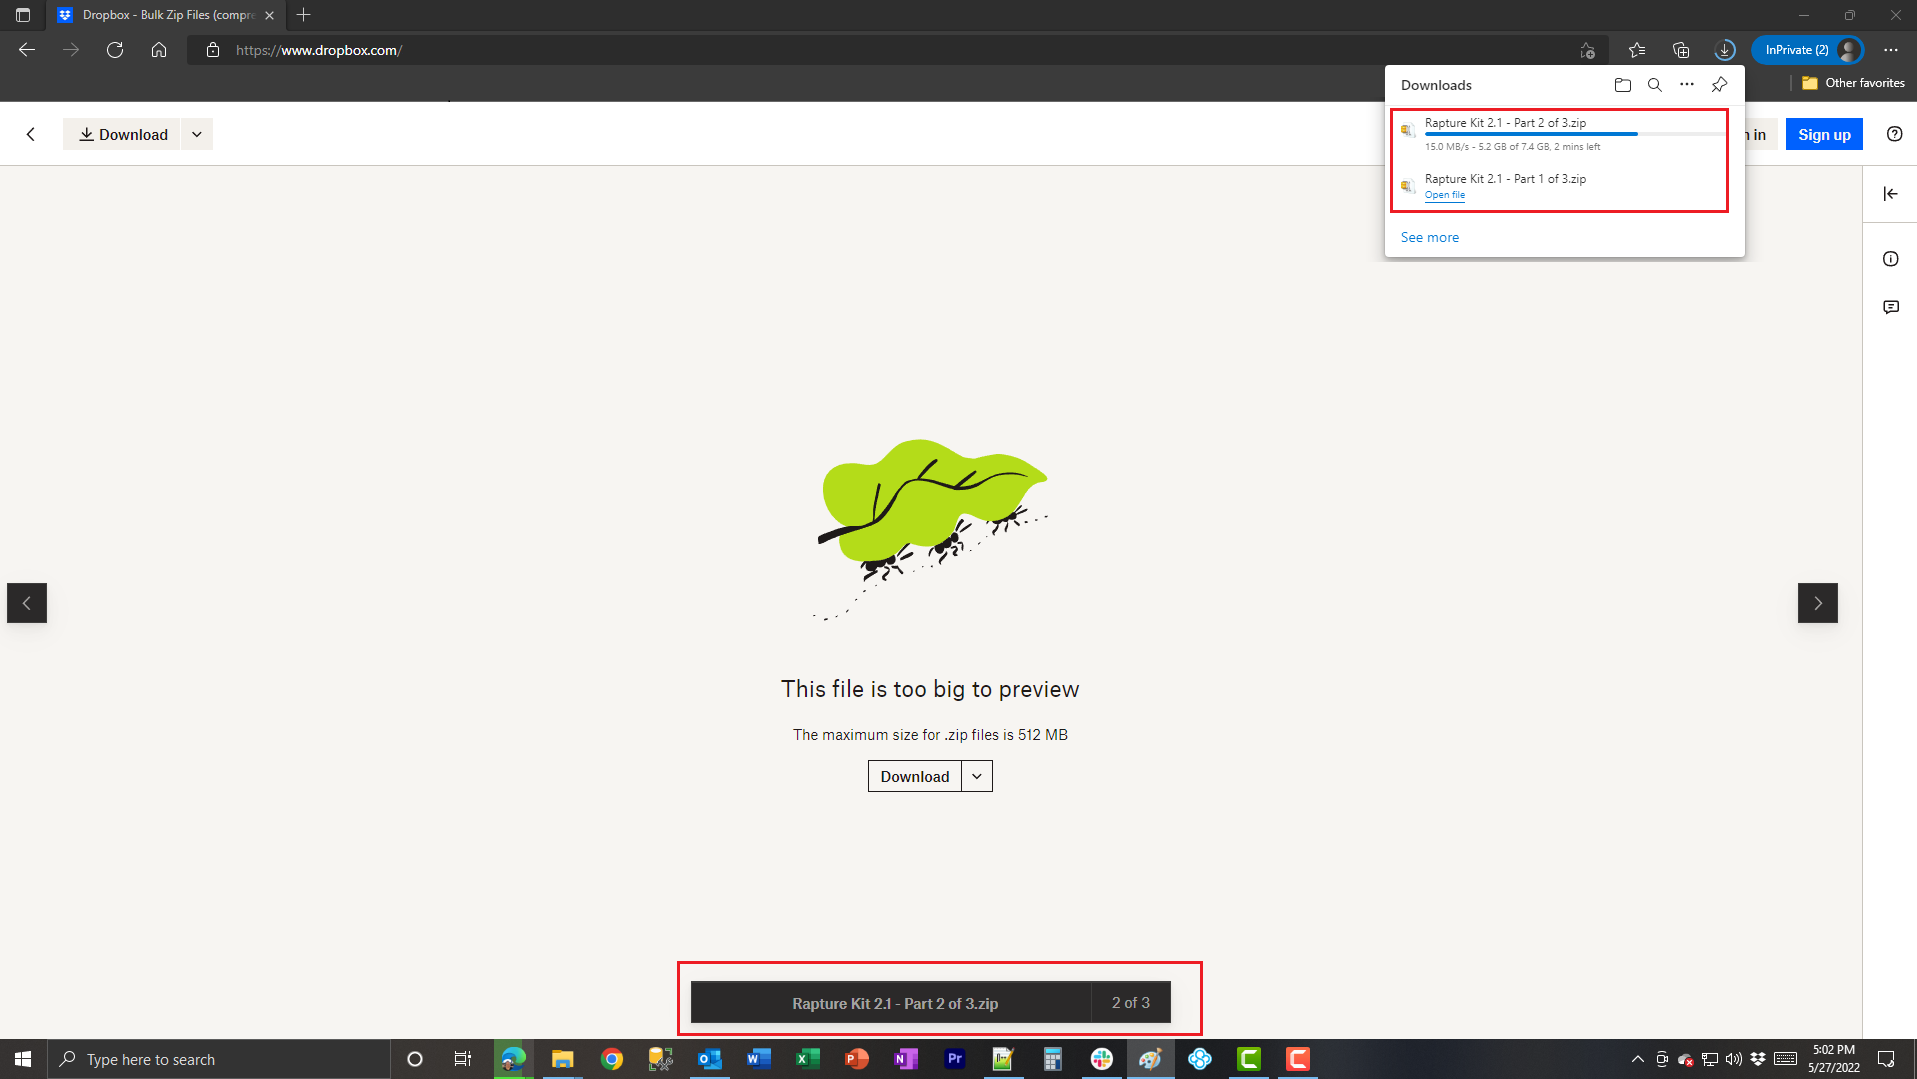
Click on the gray “Download” button. Note the download progress on the upper right. |
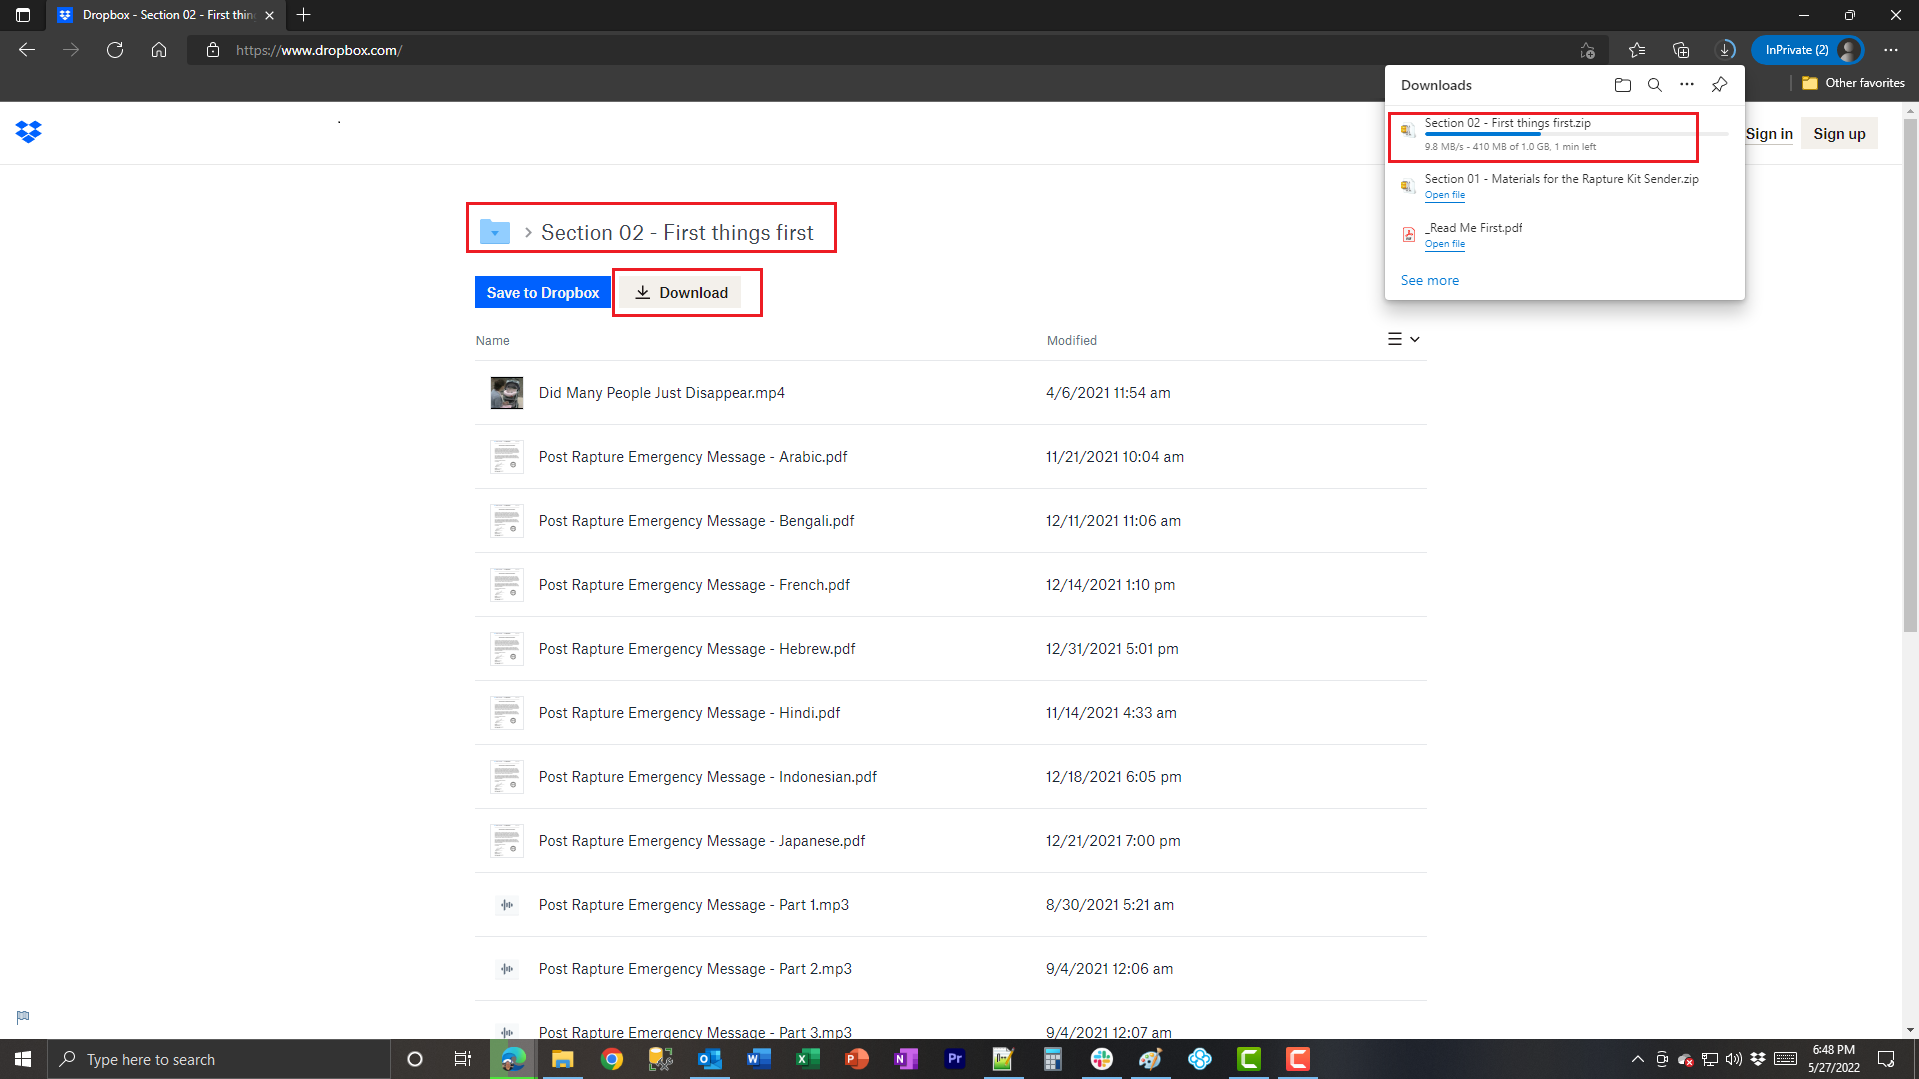 |
Navigate back a page and choose “Section 02 – First things first”. Click on the gray “Download” button. Note the download progress on the upper right. |
 |
Navigate back a page and choose “Section 03 – Bibles”. Click on the gray “Download” button. Note the download progress on the upper right. |
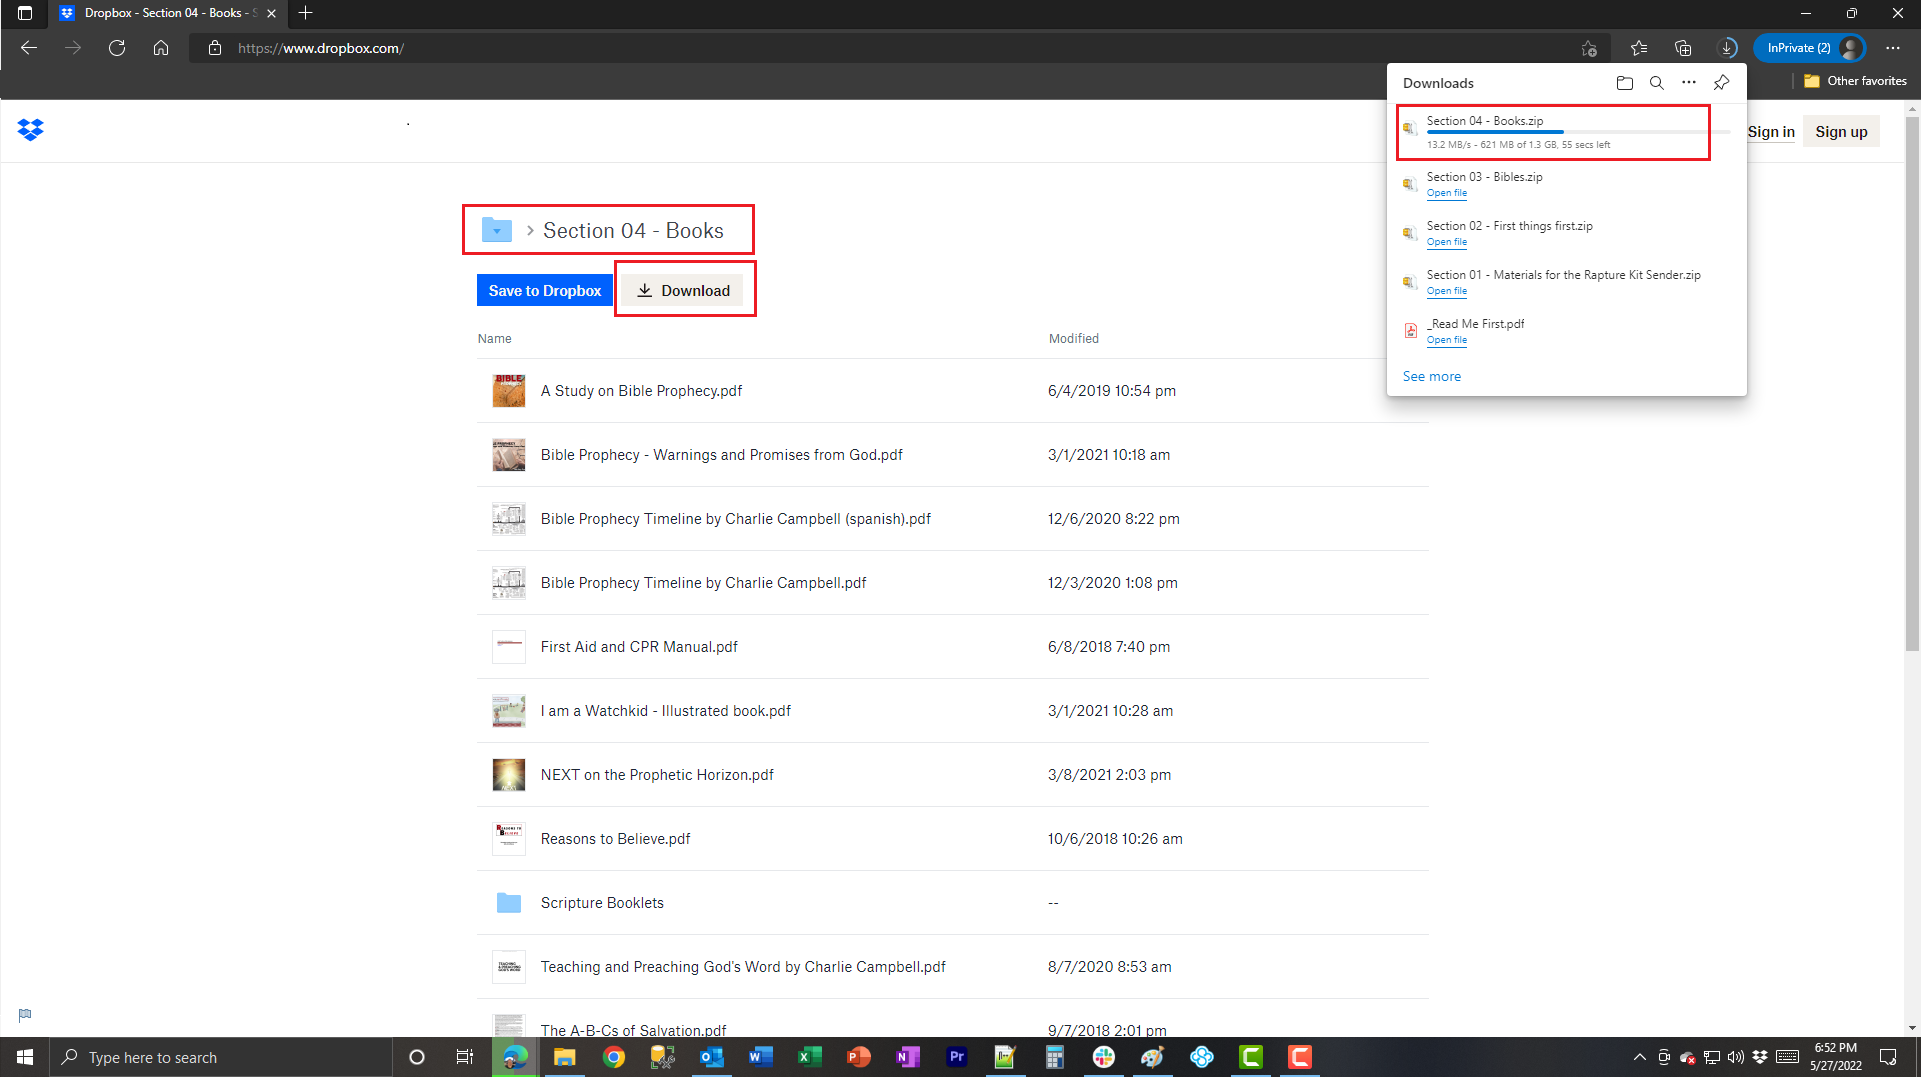 |
Navigate back a page and choose “Section 04 – Books”. Click on the gray “Download” button. Note the download progress on the upper right. |
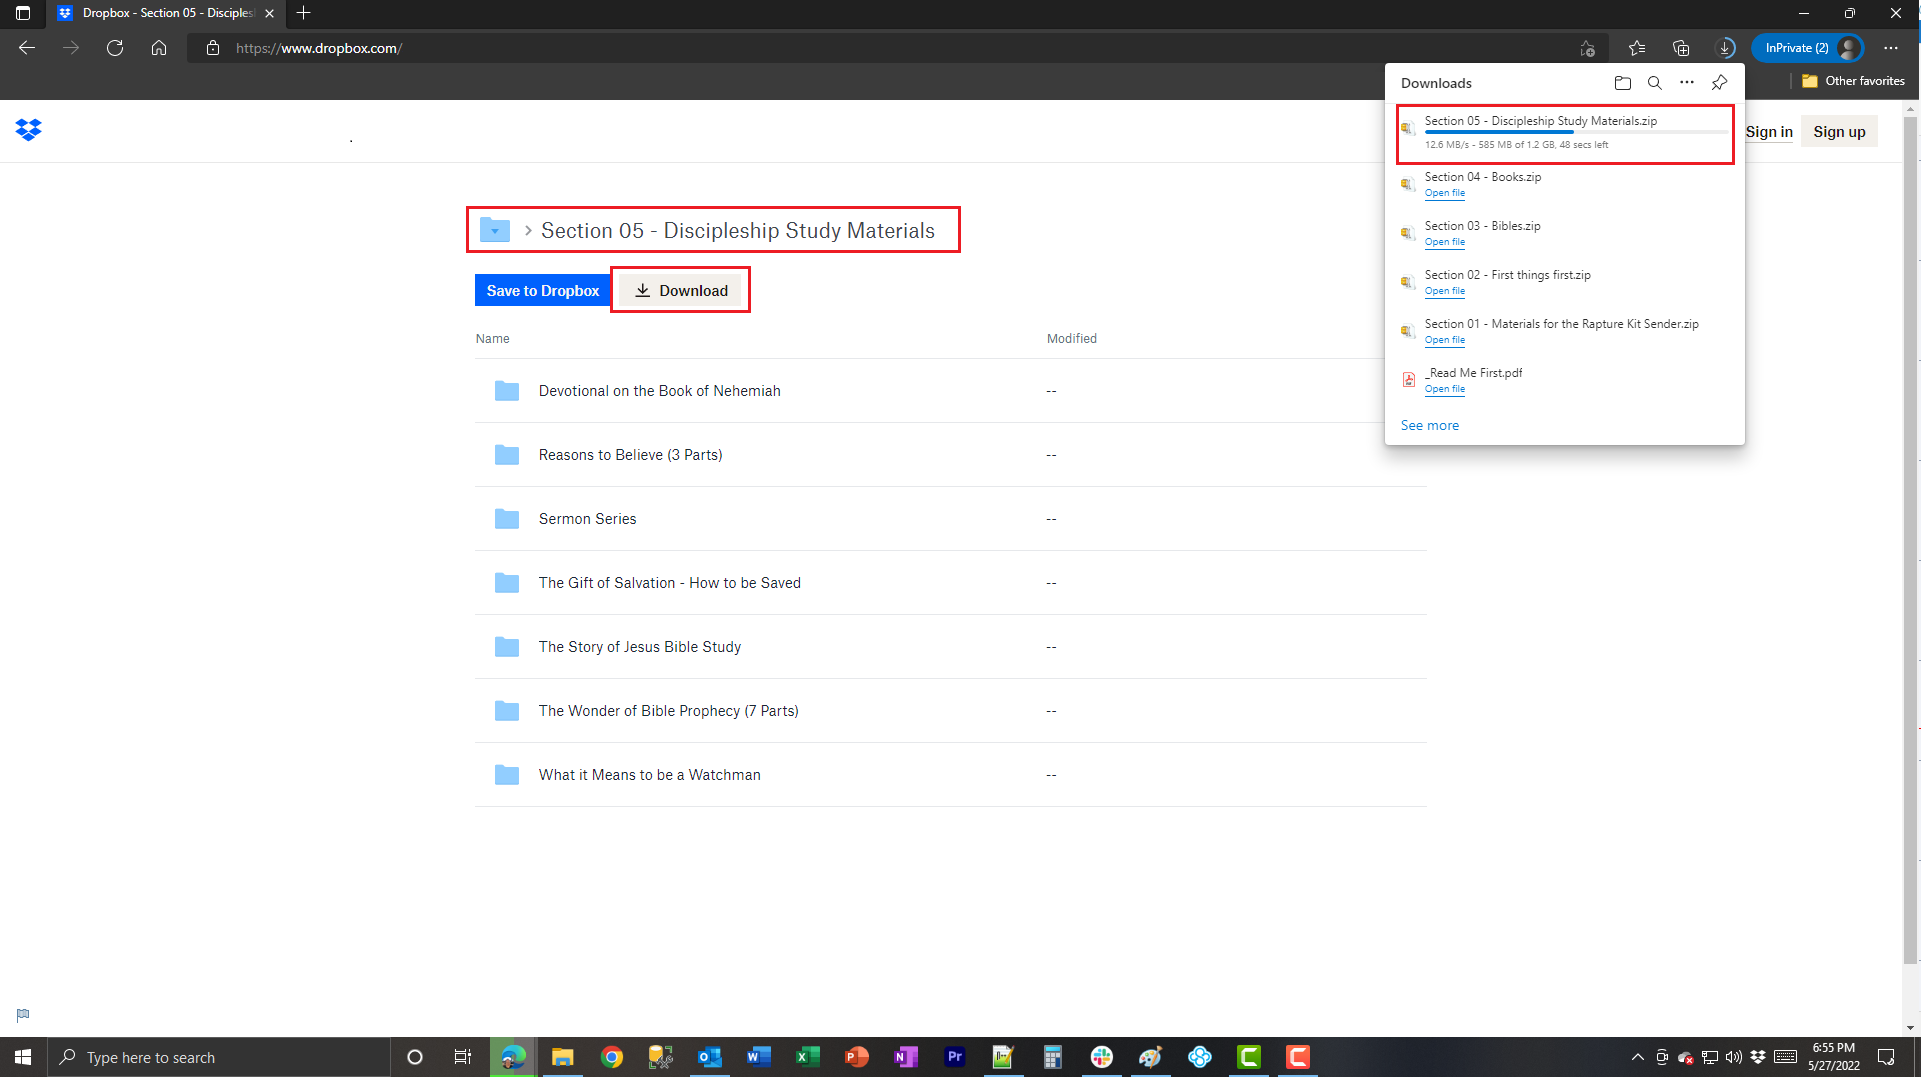 |
Navigate back a page and choose “Section 05 – Discipleship Study Materials”. Click on the gray “Download” button. Note the download progress on the upper right. |
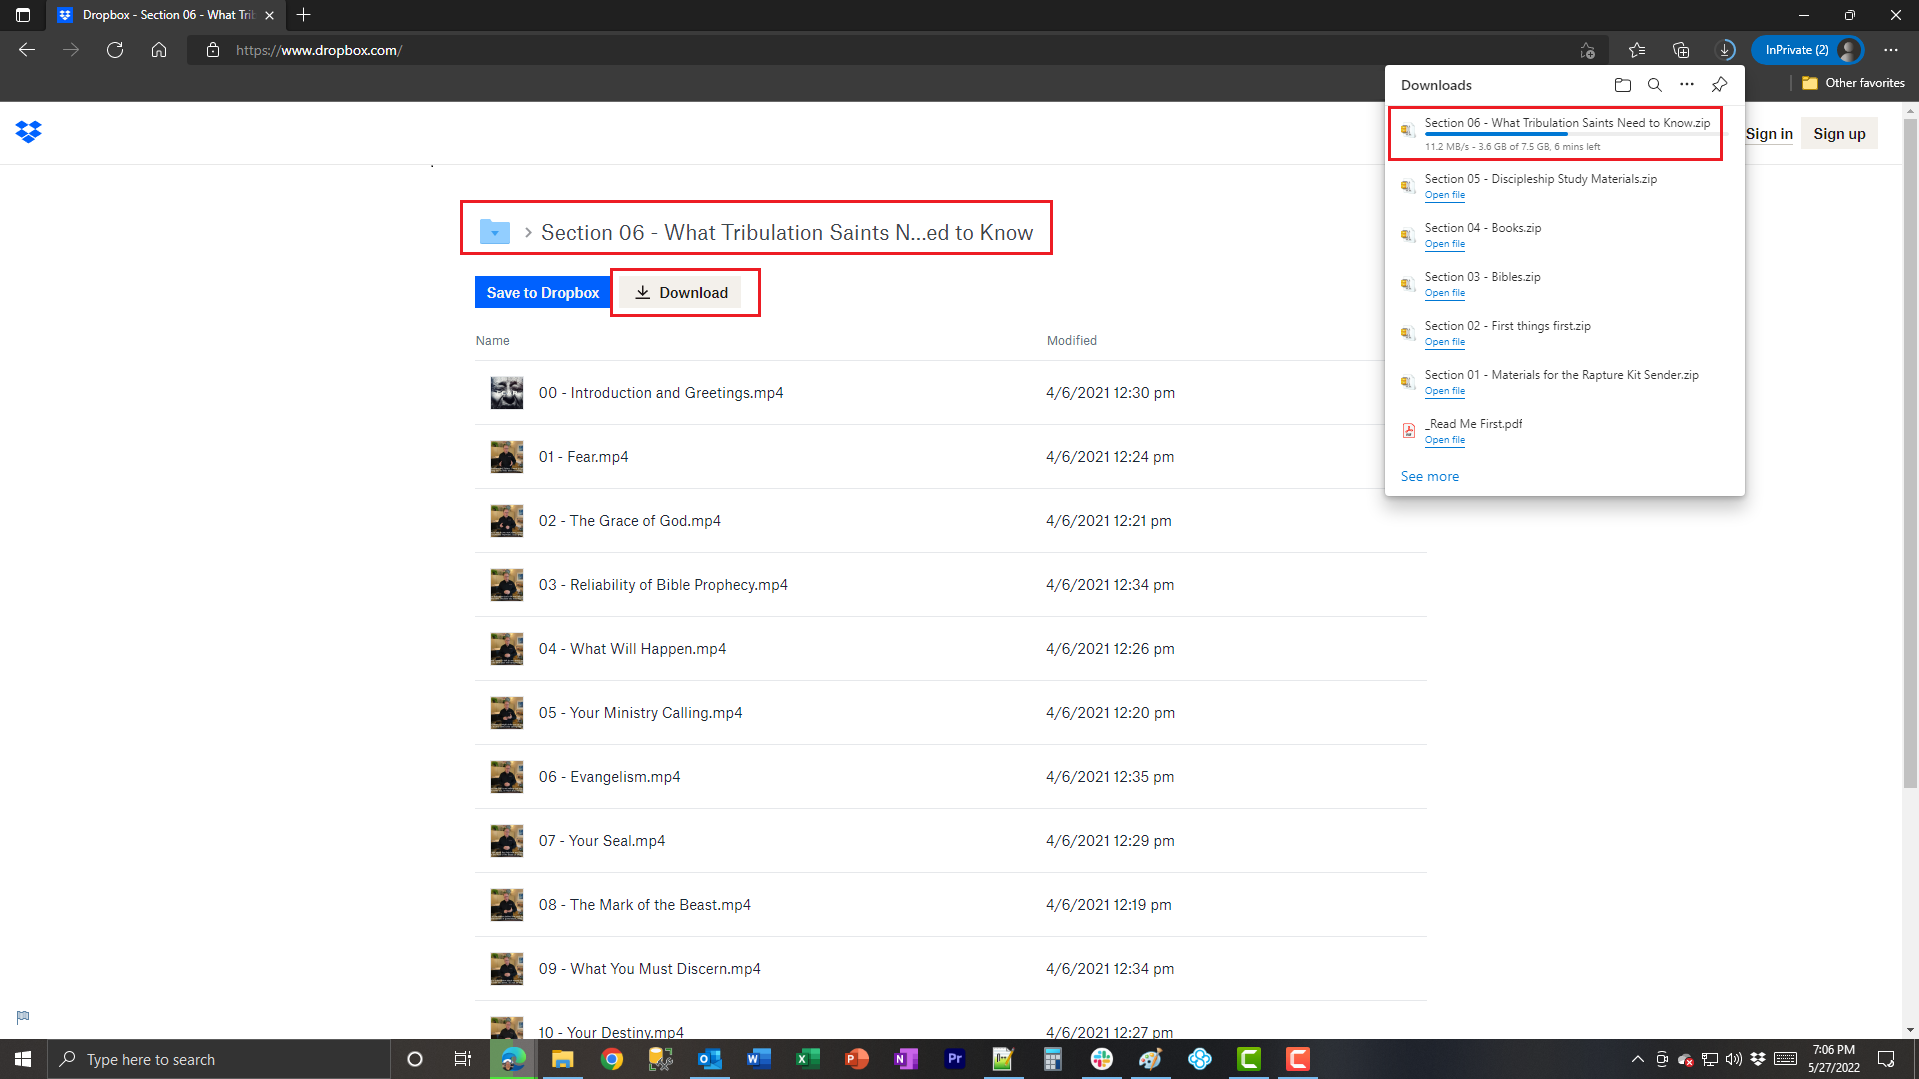 |
Navigate back a page and choose “Section 06 – What Tribulation Saints Need to Know”. Click on the gray “Download” button. Note the download progress on the upper right. |
 |
Navigate back a page and choose “Section 07 – Sermons and Teachings”. Click on the gray “Download” button. Note the download progress on the upper right. |
 |
Navigate back a page and choose “Section 08 – Additional Articles”. Click on the gray “Download” button. Note the download progress on the upper right. |
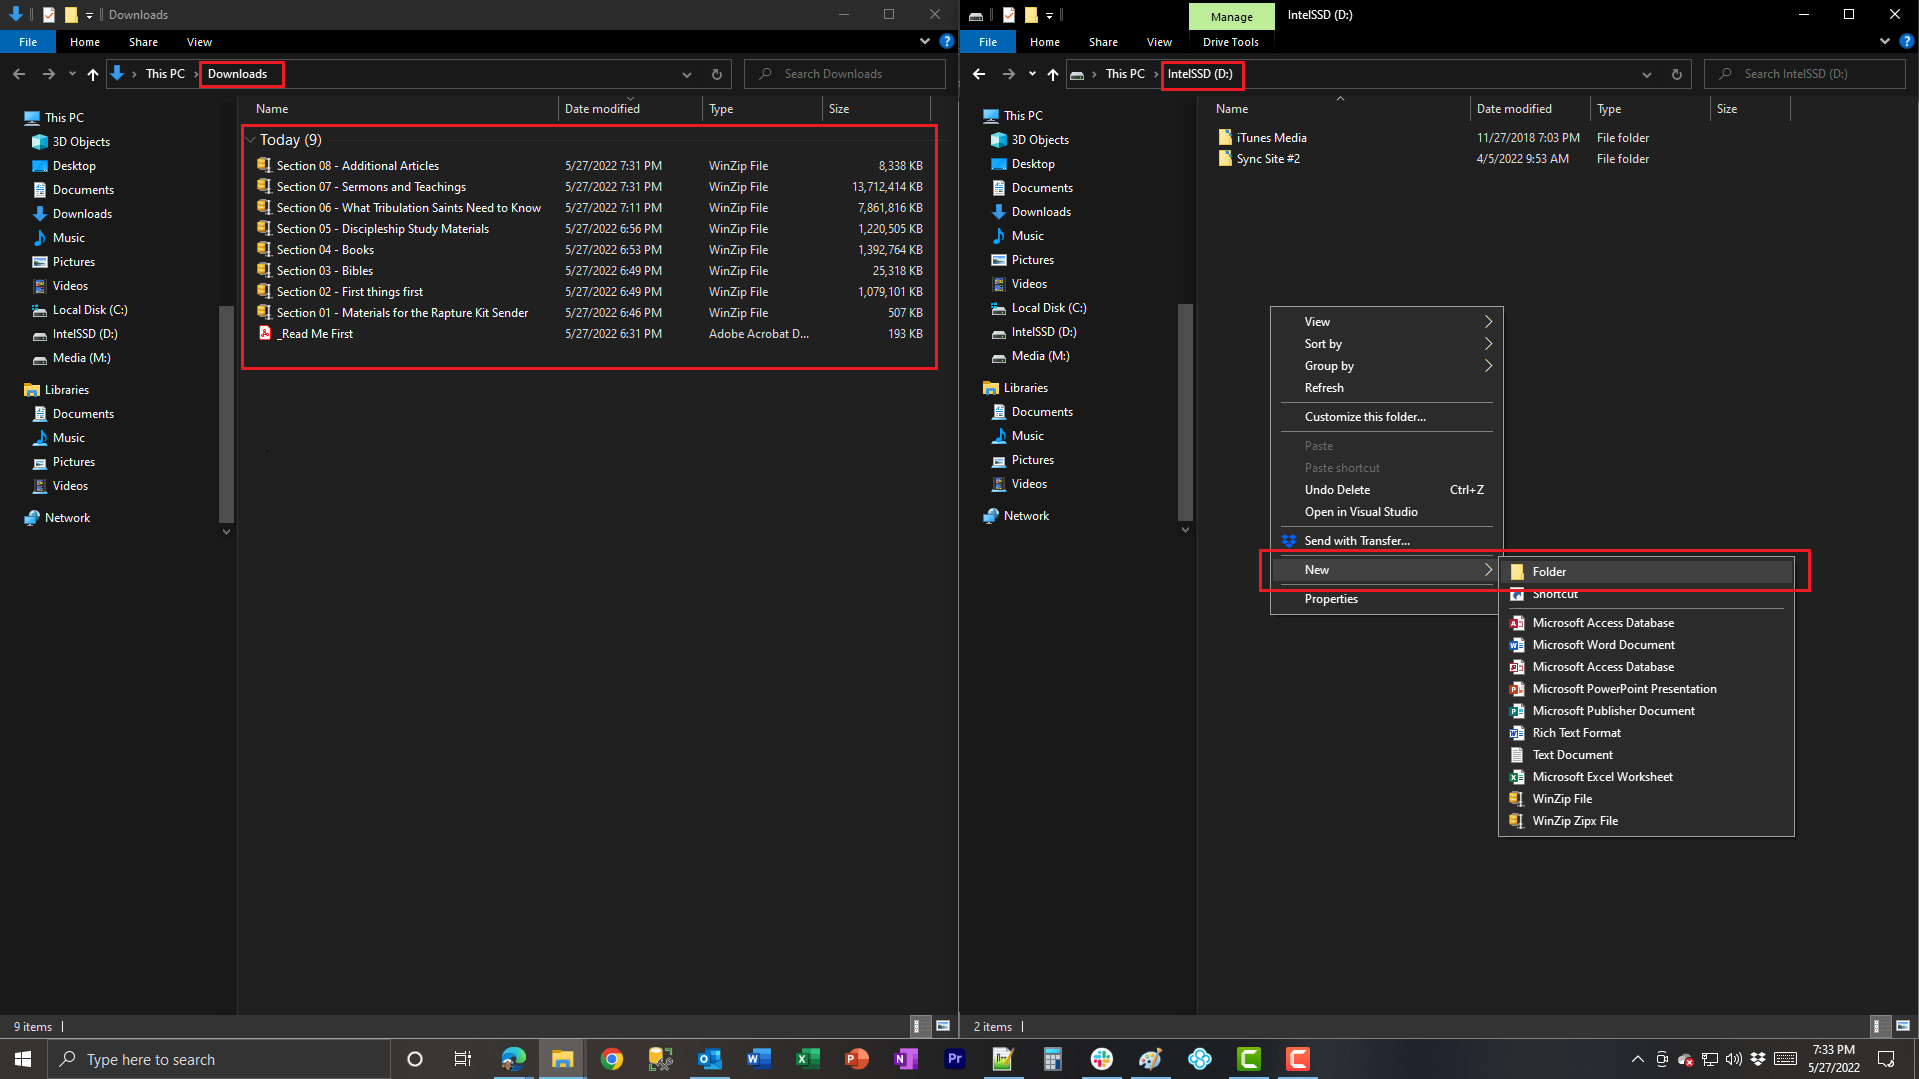 |
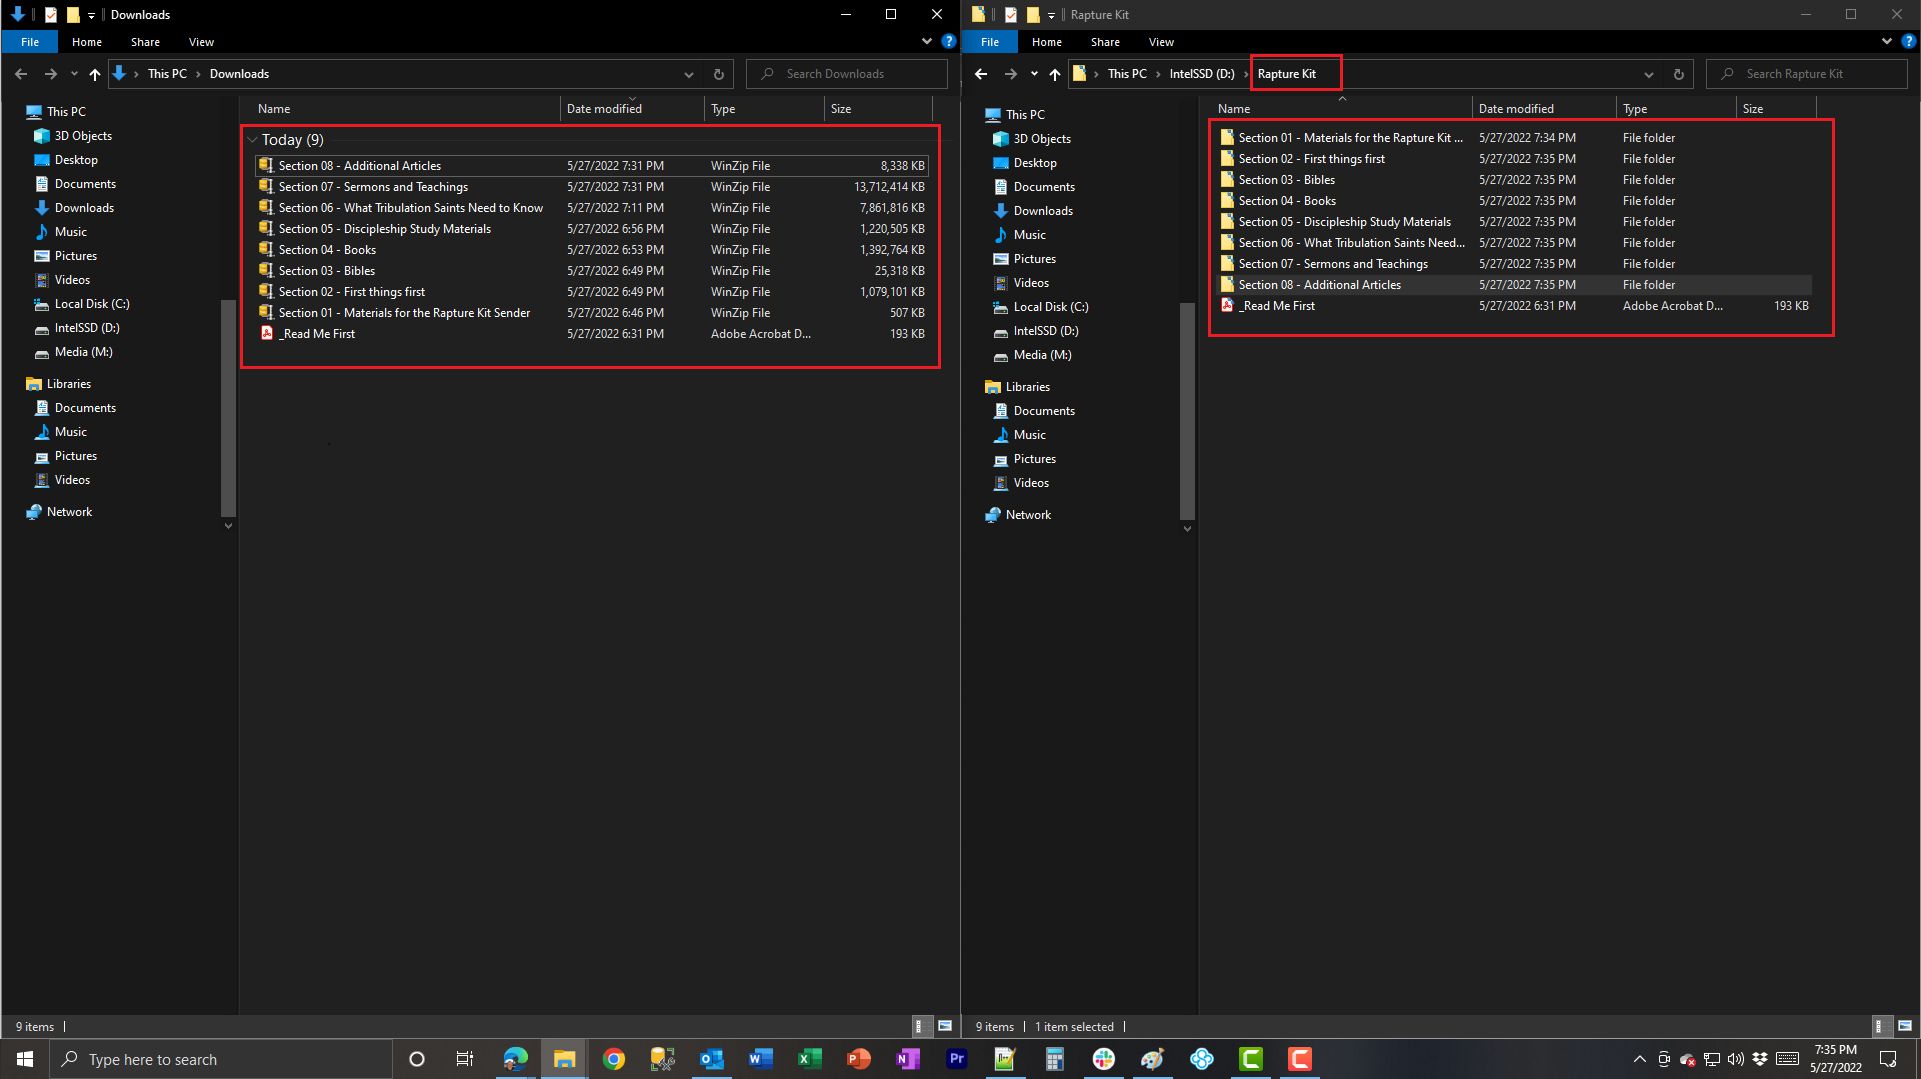
We are at the point where we need side-by-side views of File Explorer. On the left side, you should display the Downloads area, where you will see the “_Read Me First.PDF” document and 8 ZIP files…one each of the Sections of the Rapture Kit Structure. This is the Source. On the right side of your screen, navigate to the Target where you want the Rapture Kit to be located on your system. In the screenshot, you can see we chose D: drive and created a New Folder by right clicking and choosing “New” then “Folder”. Name the folder “Rapture Kit” if you like. |
 |
We must now create all the folders corresponding to the Zip file names on the left. They are not made automatically by unzipping, unfortunately. As before, in the Target Rapture Kit folder, go ahead and right-click choose “New” then “Folder” and name it. For instance, the first will be “Section 01 – Materials for the Rapture Kit Sender”. Continue until you create the final folder “Section 08 – Additional Articles”. You might notice that we just manually copied the “_Read Me First.PDF” file into the Target root of the Rapture Kit folder on the right screen. |
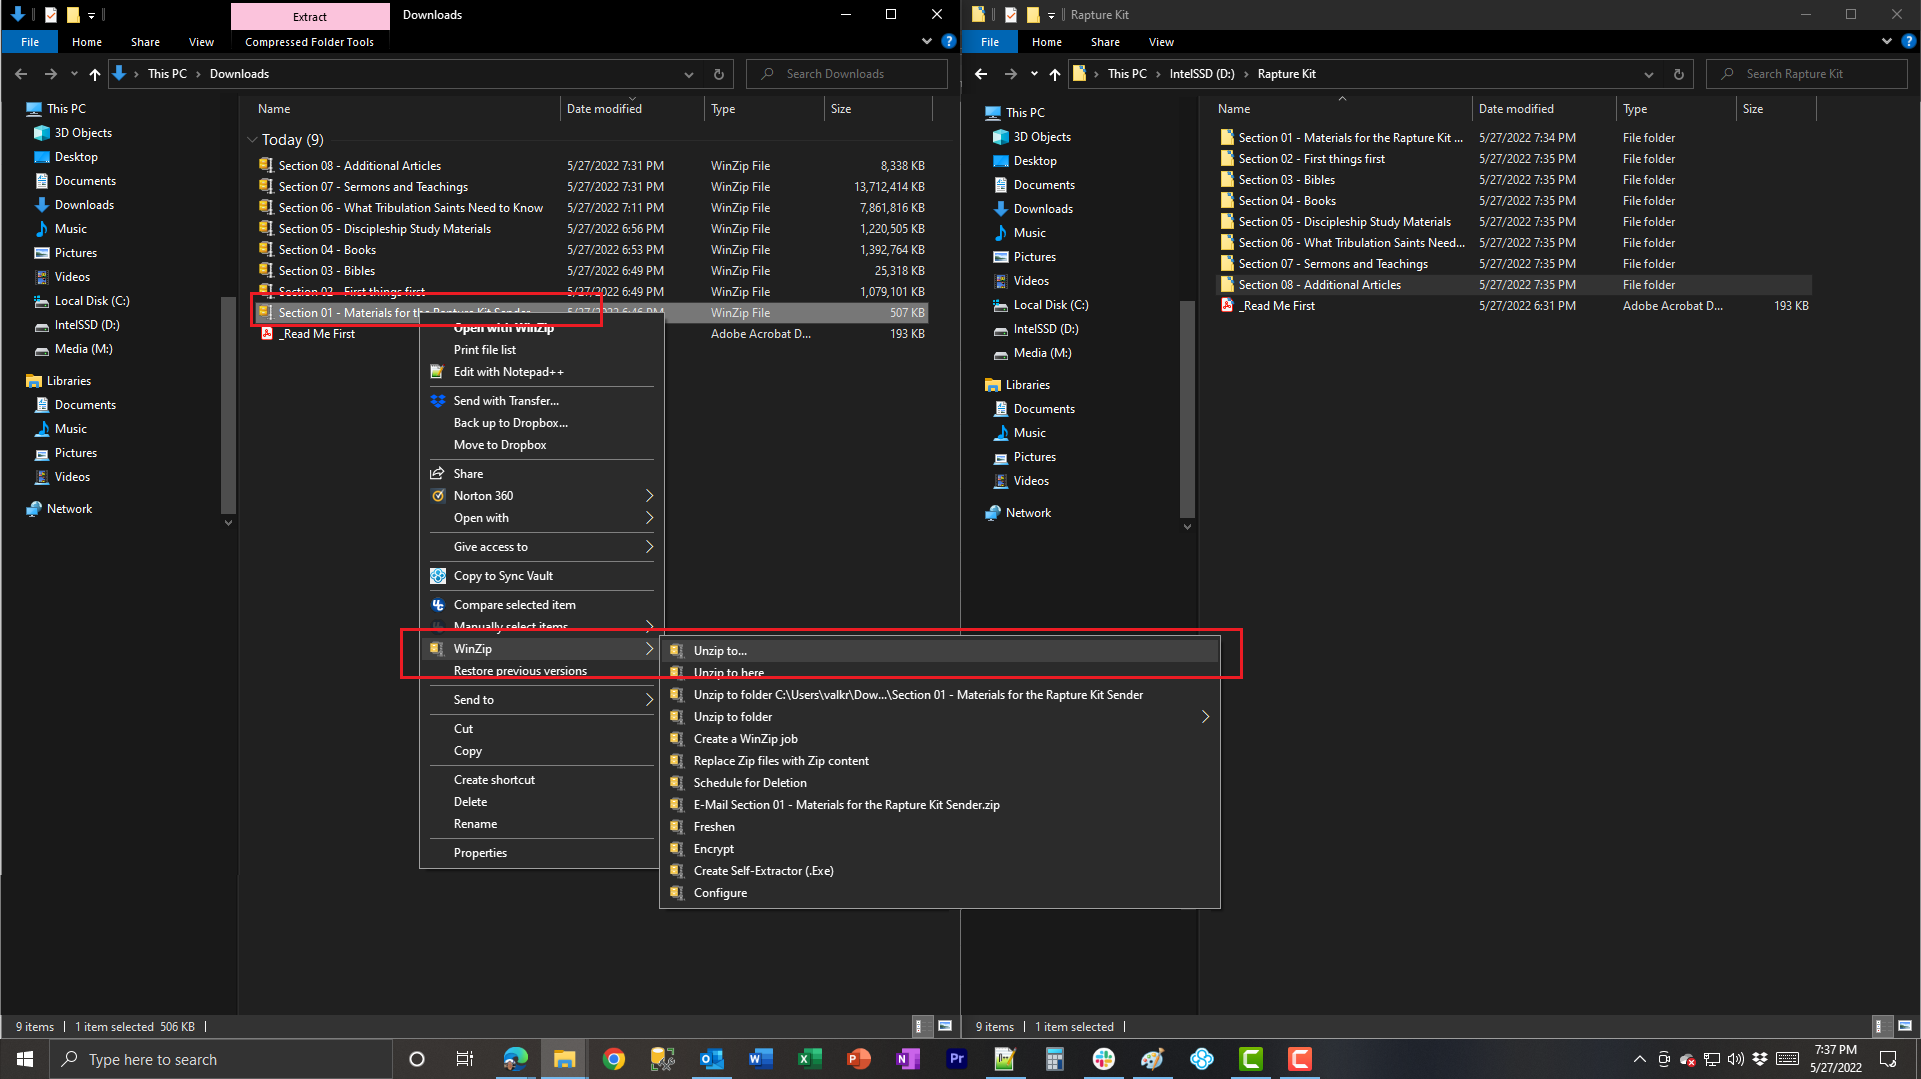 |
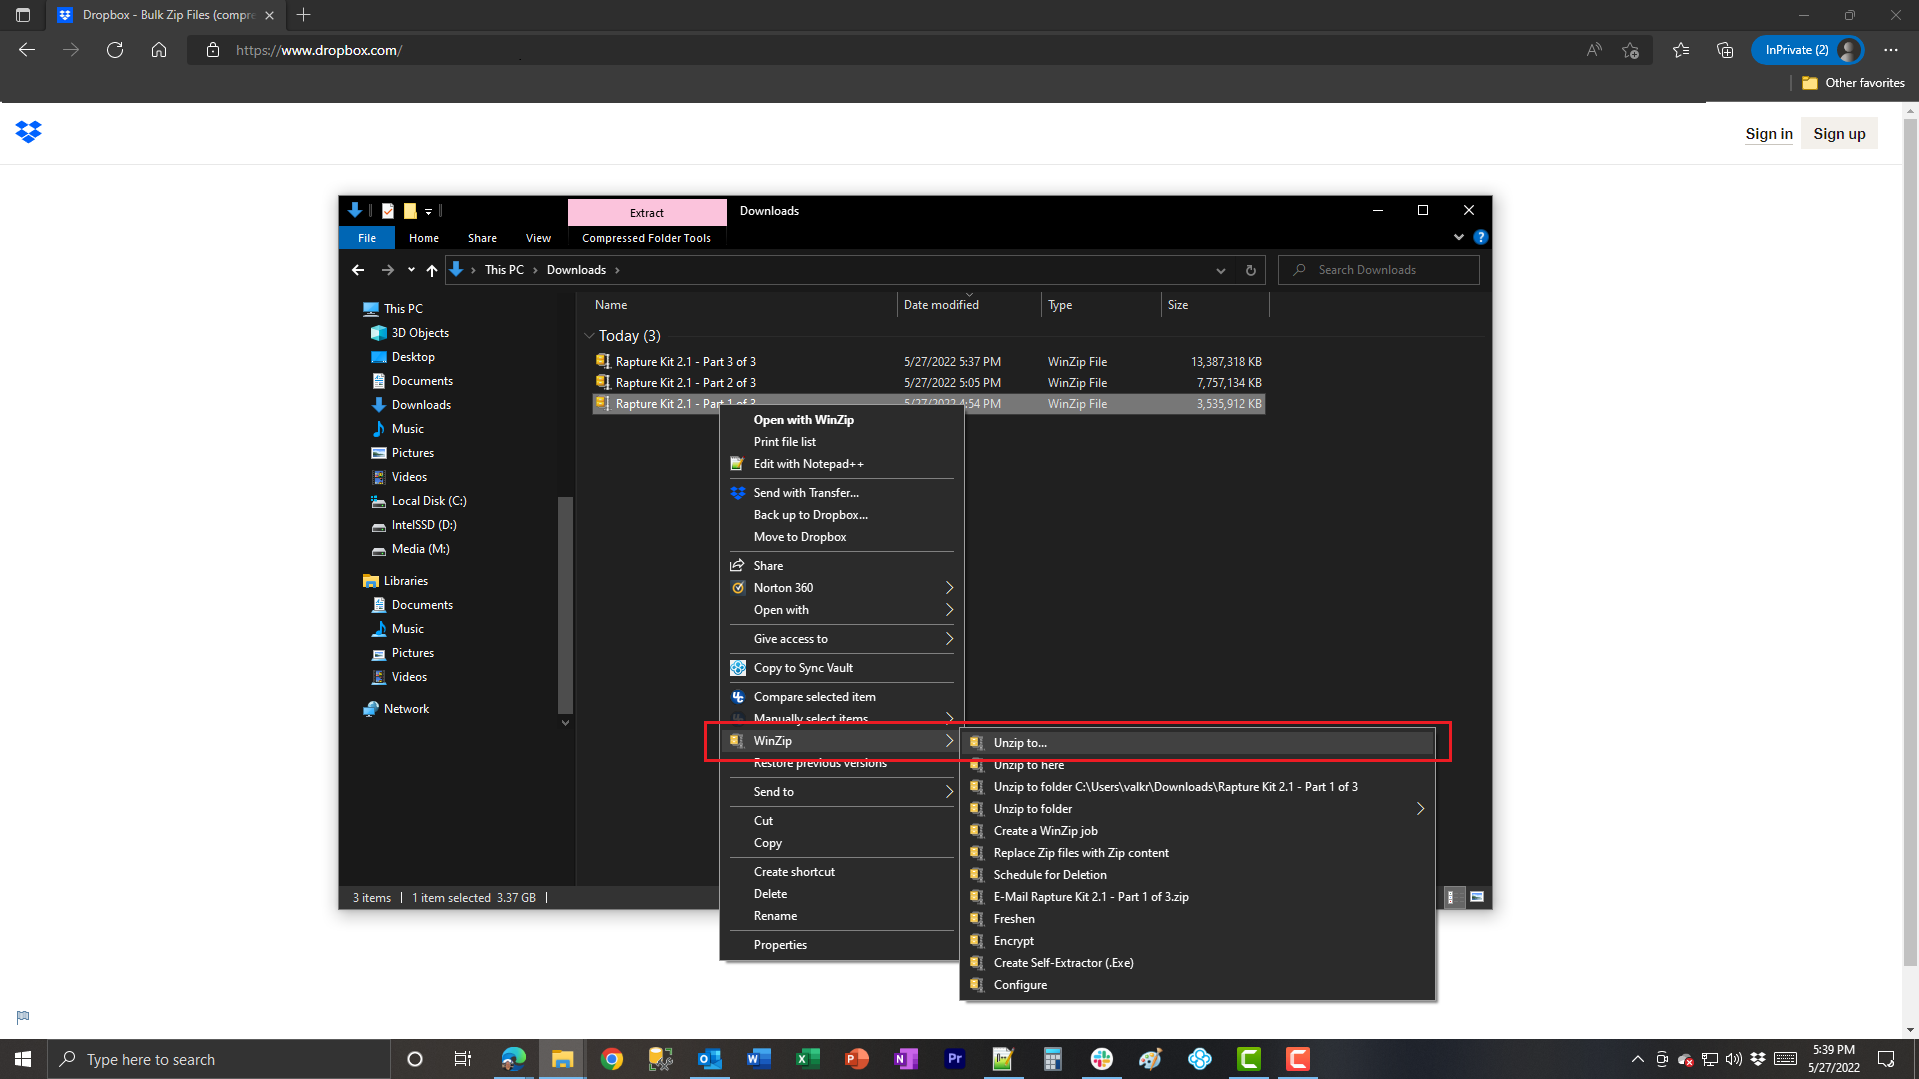
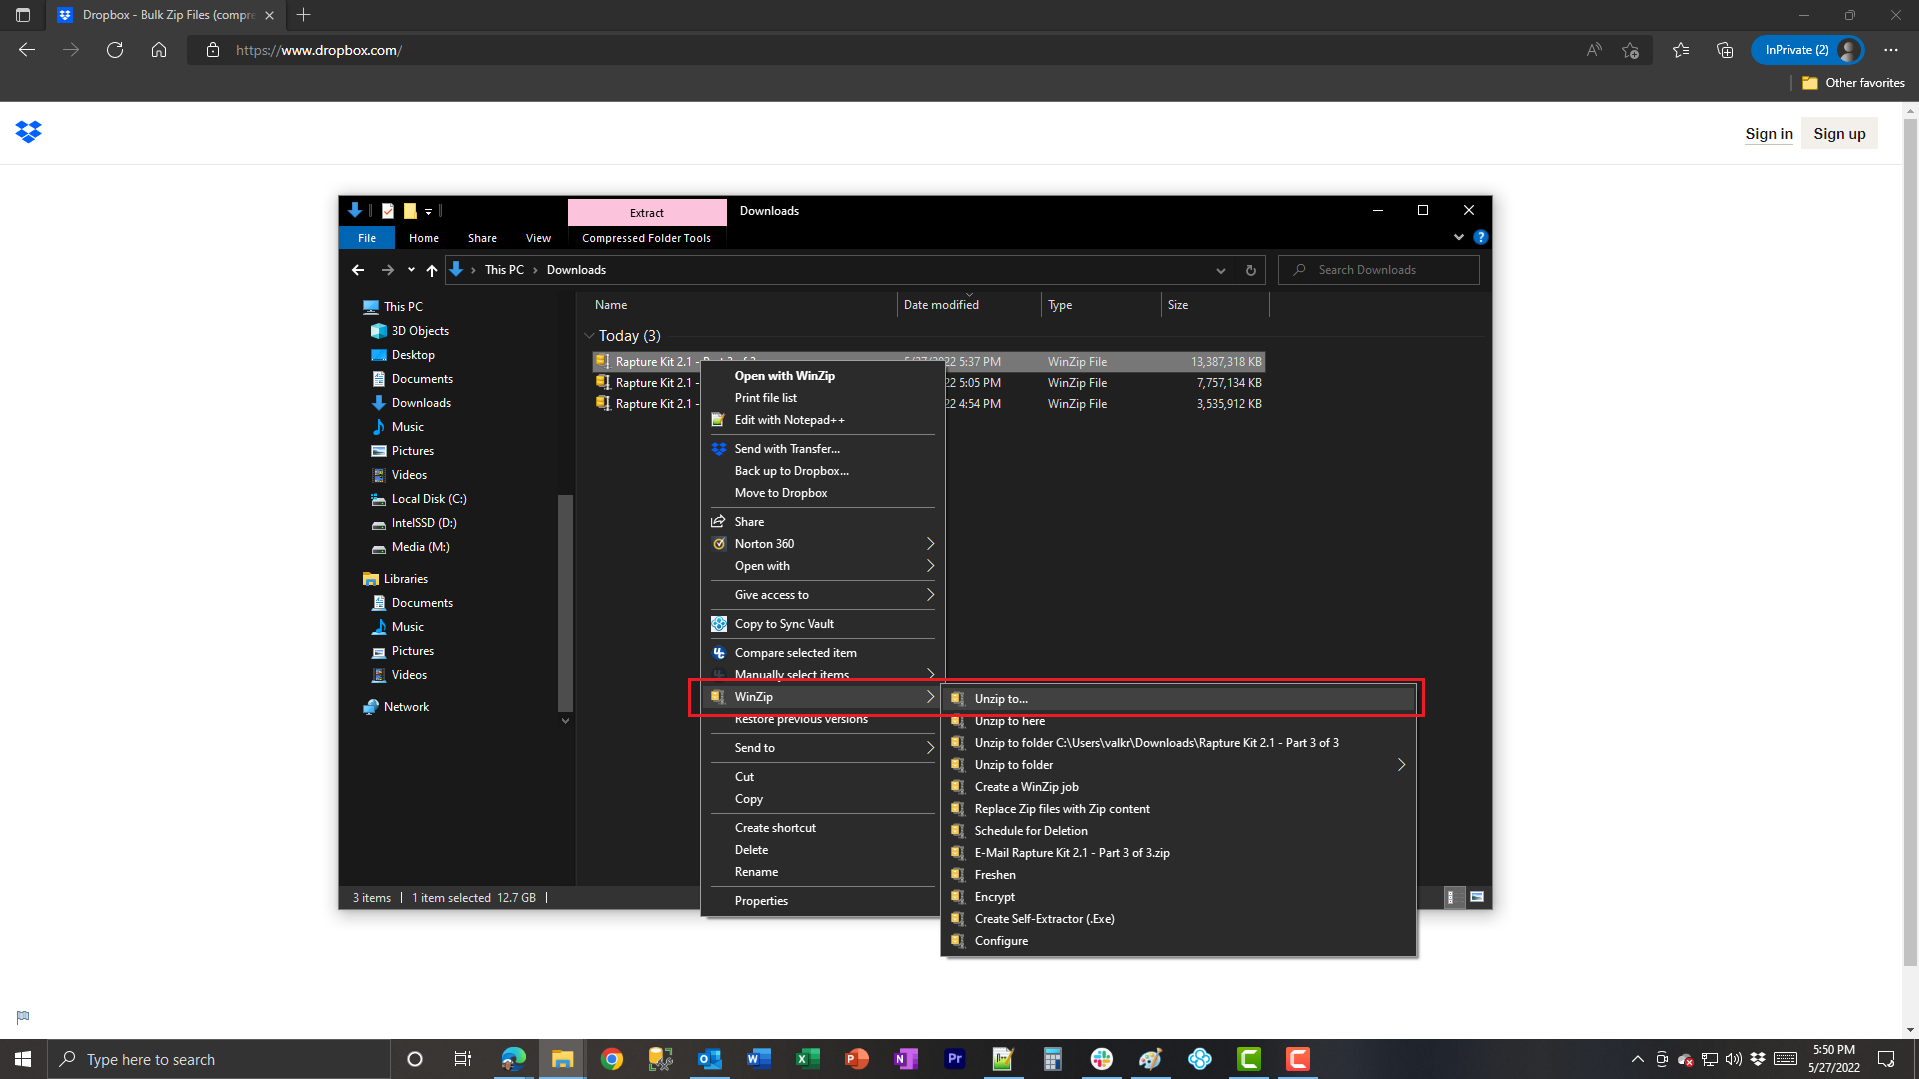
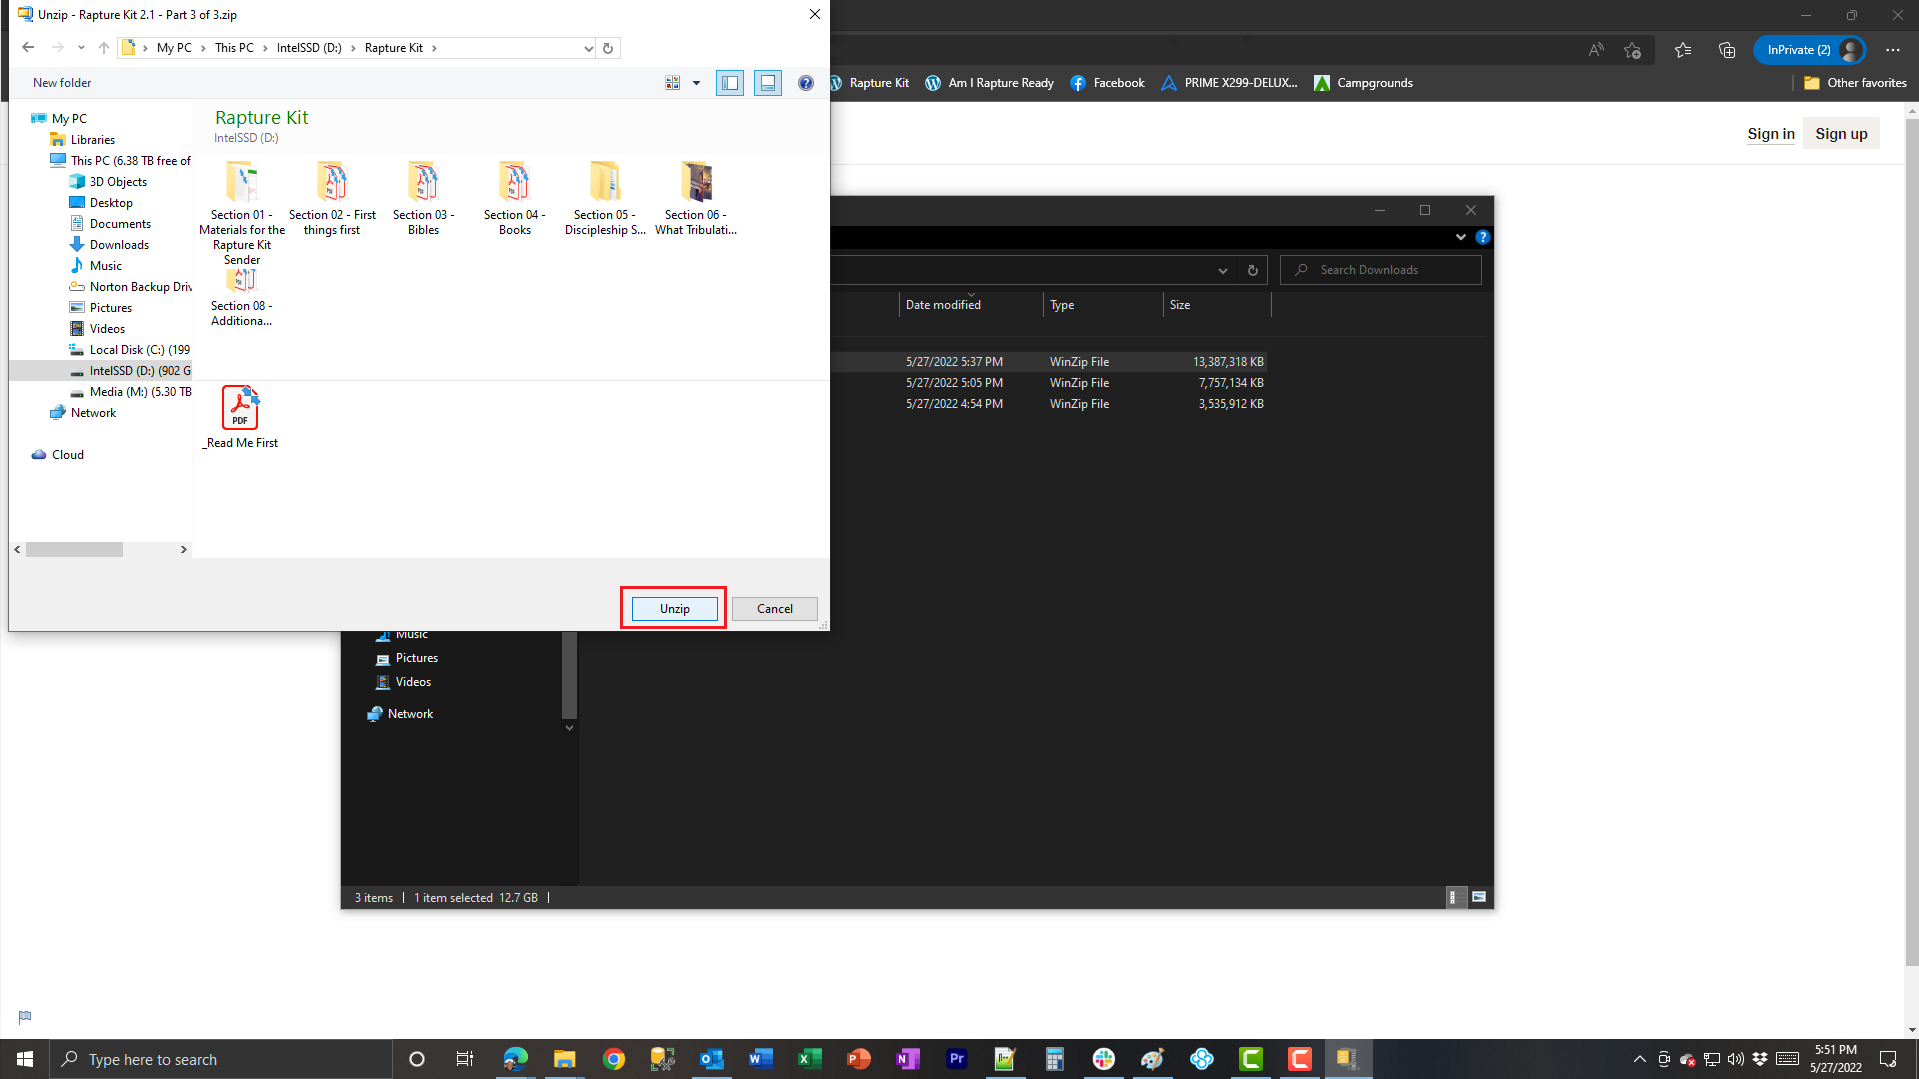
On the left (source) screen, right click on “Section 01 – Materials for the Rapture Kit Sender” and choose “WinZip” then “Unzip to…”. Although not illustrated, the PKZip dialog will pop-up where you can choose where to unzip the file. In this case, choose the Target “Section 01 – Materials for the Rapture Kit Sender” folder and click “Unzip” on the bottom right. |
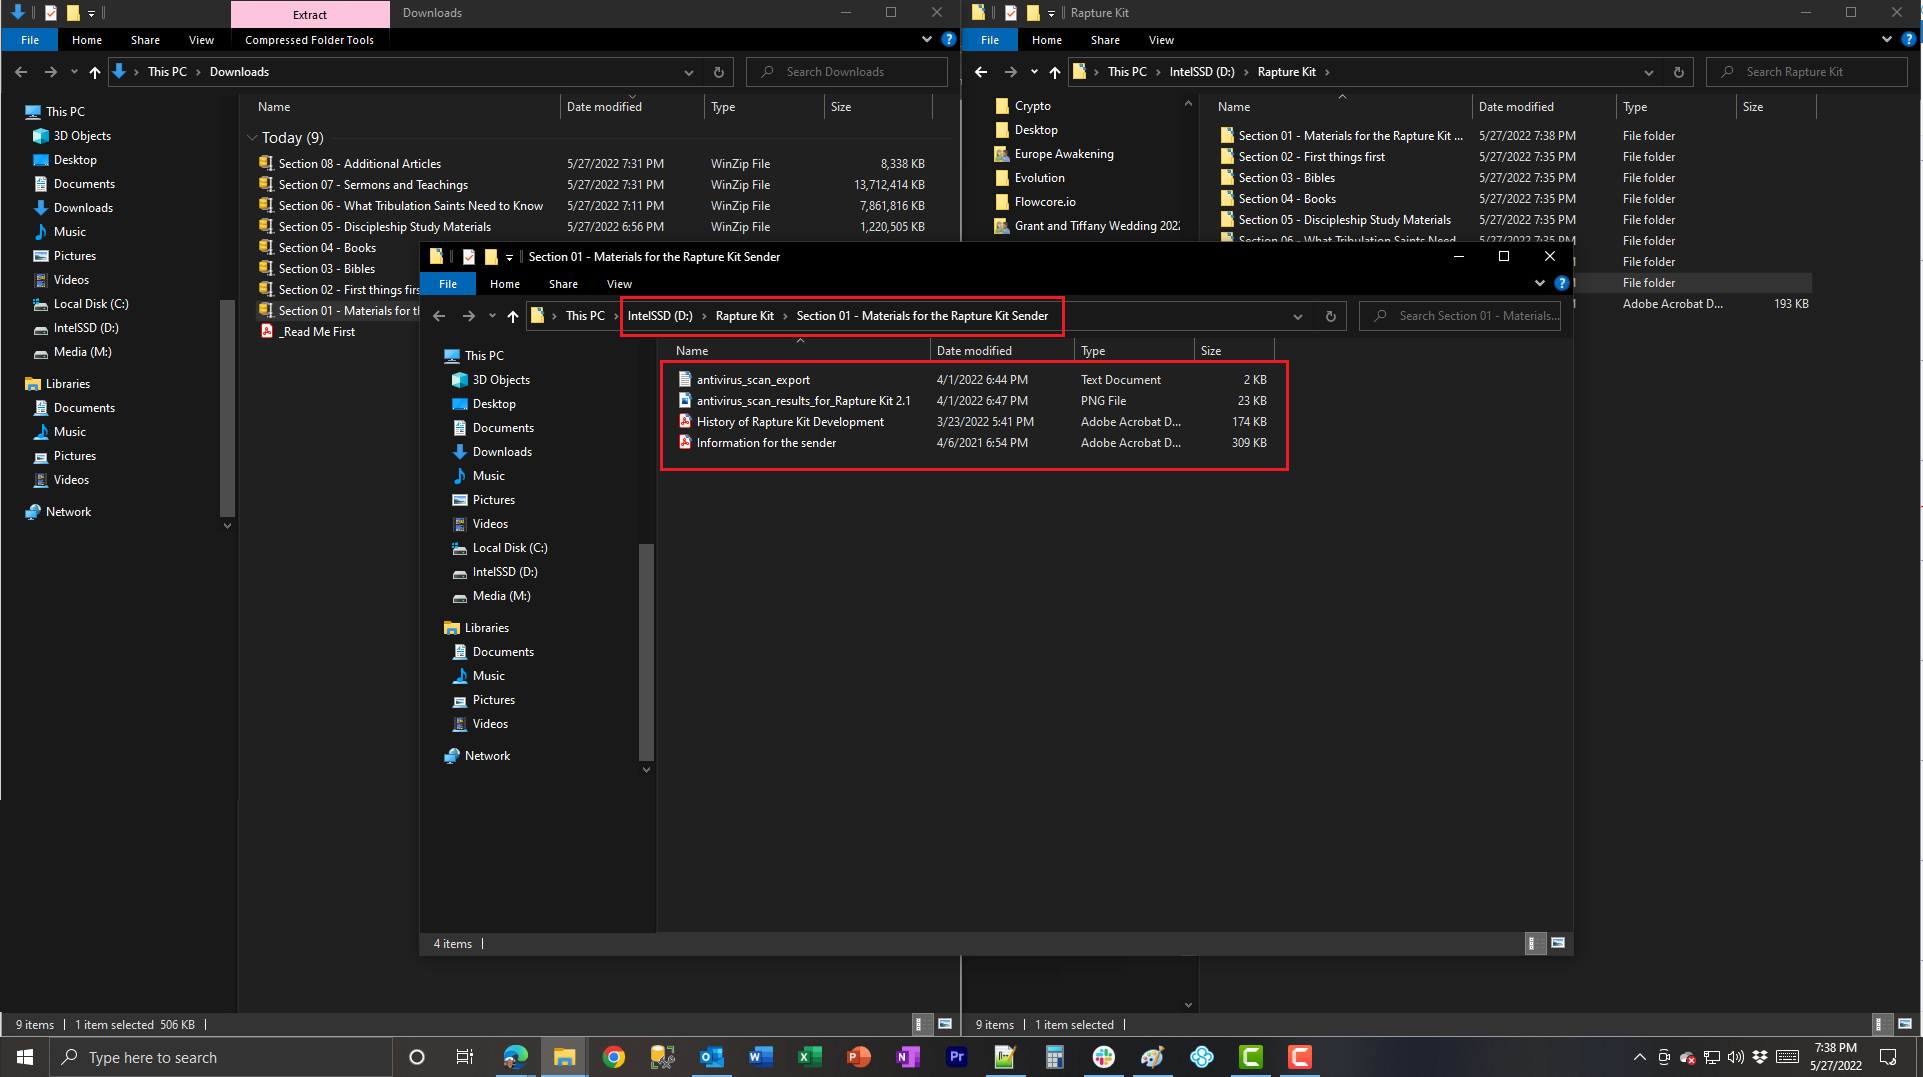 |
After the Zip file decompresses “Section 01 – Materials for the Rapture Kit Sender” you will see the resulting contents inside the target folder. You can close this window. |
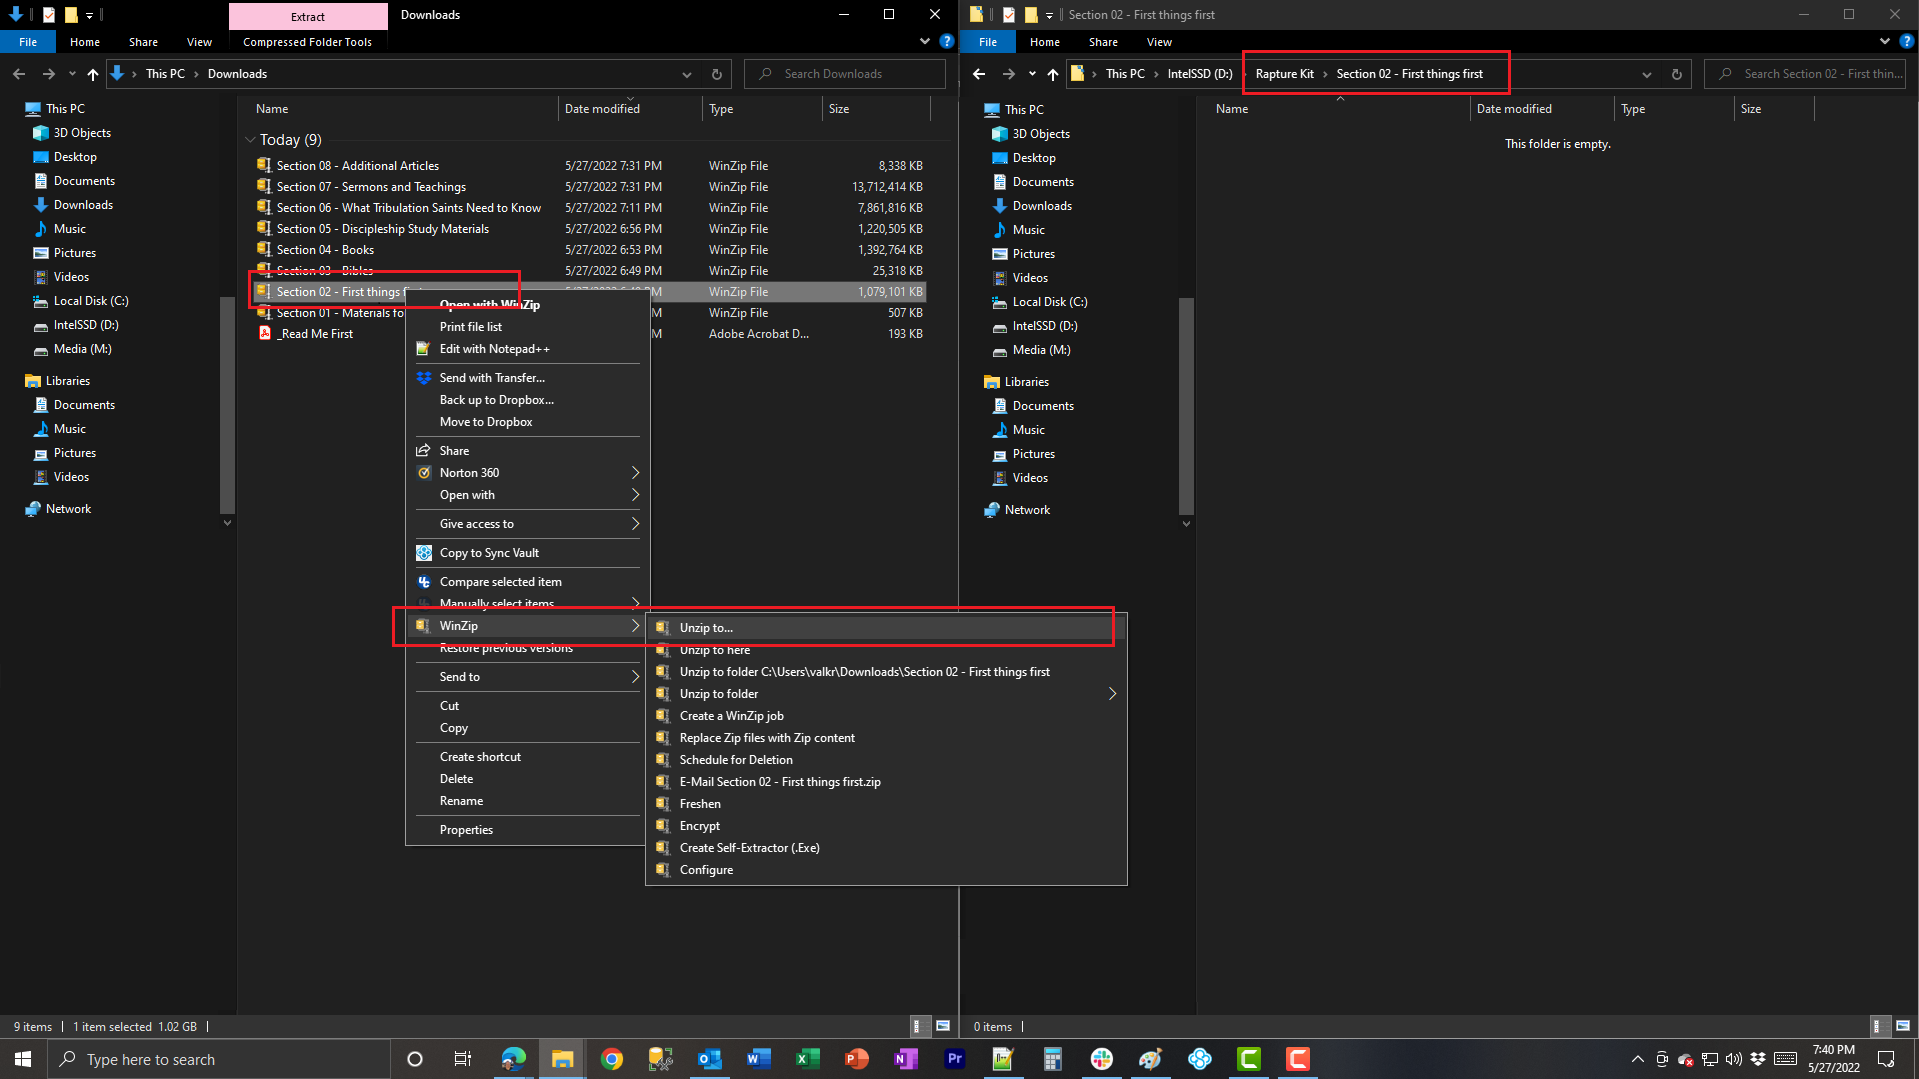 |
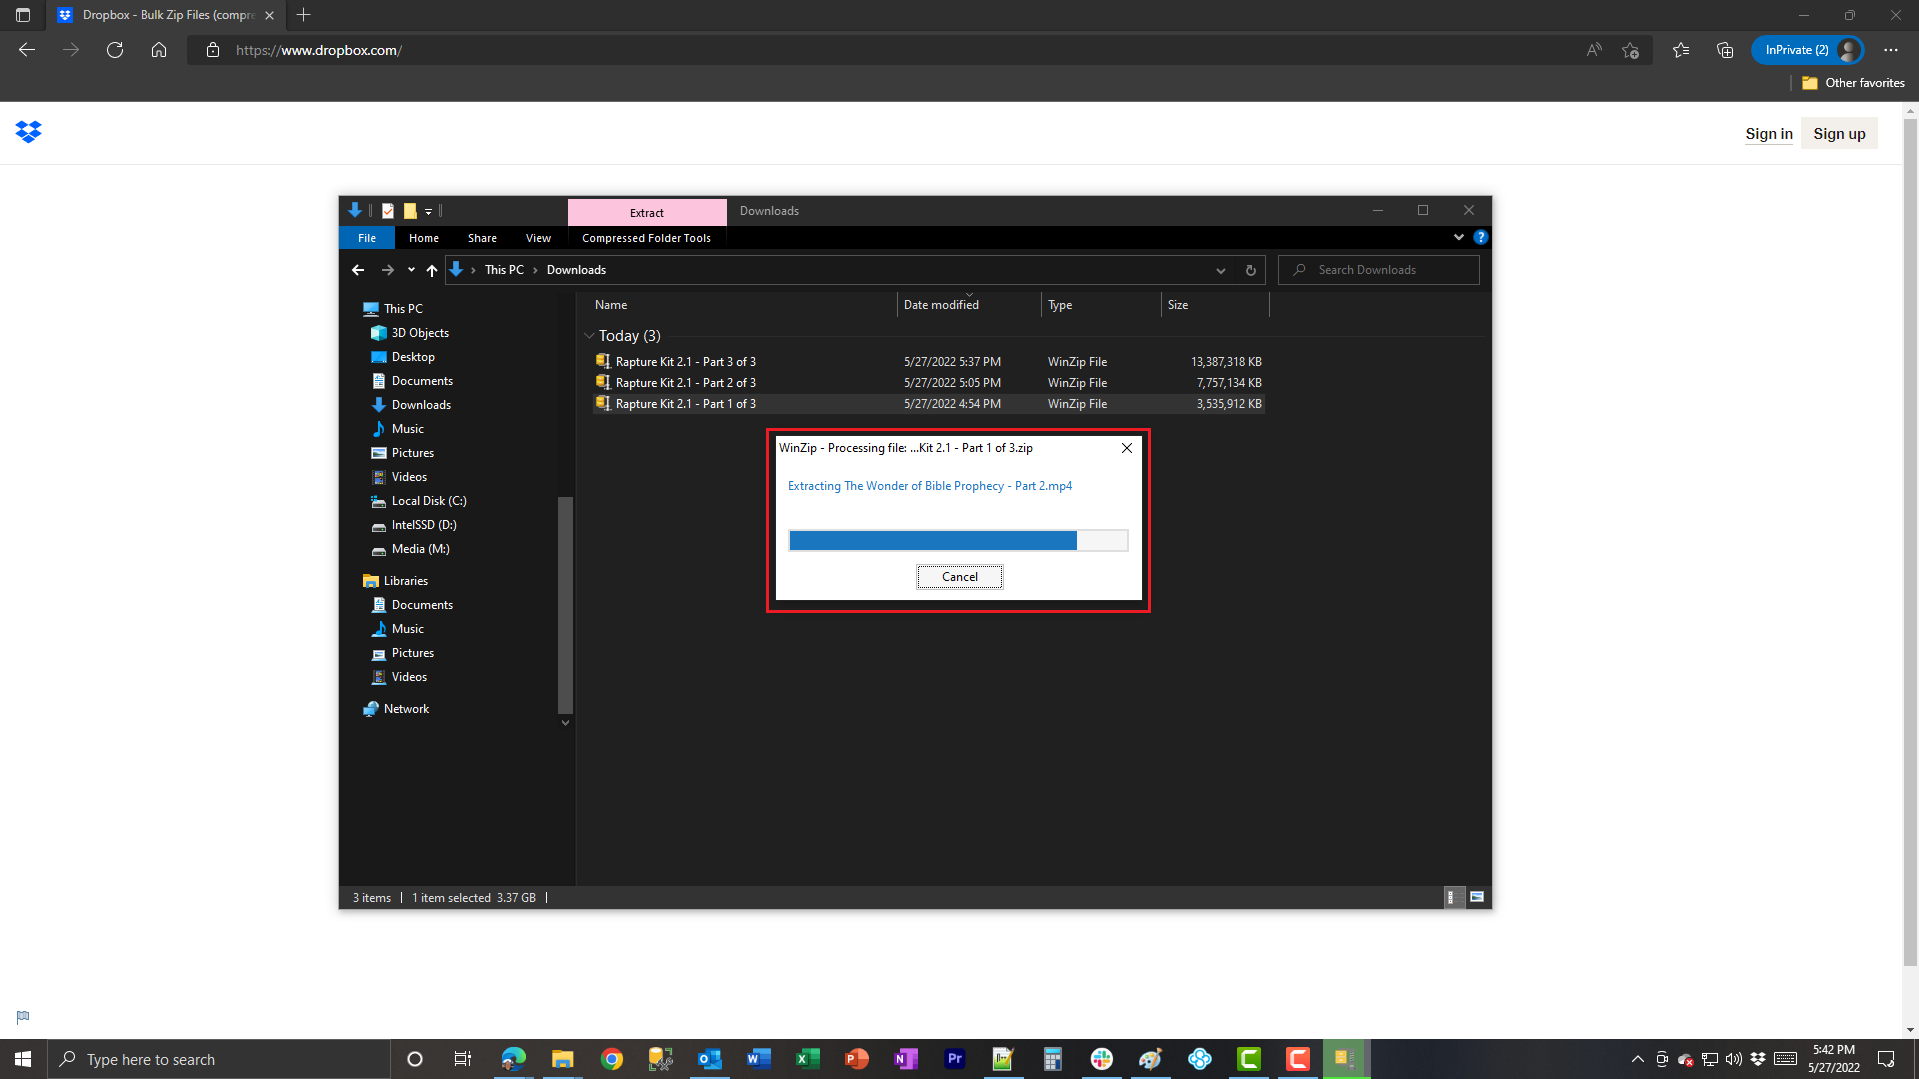
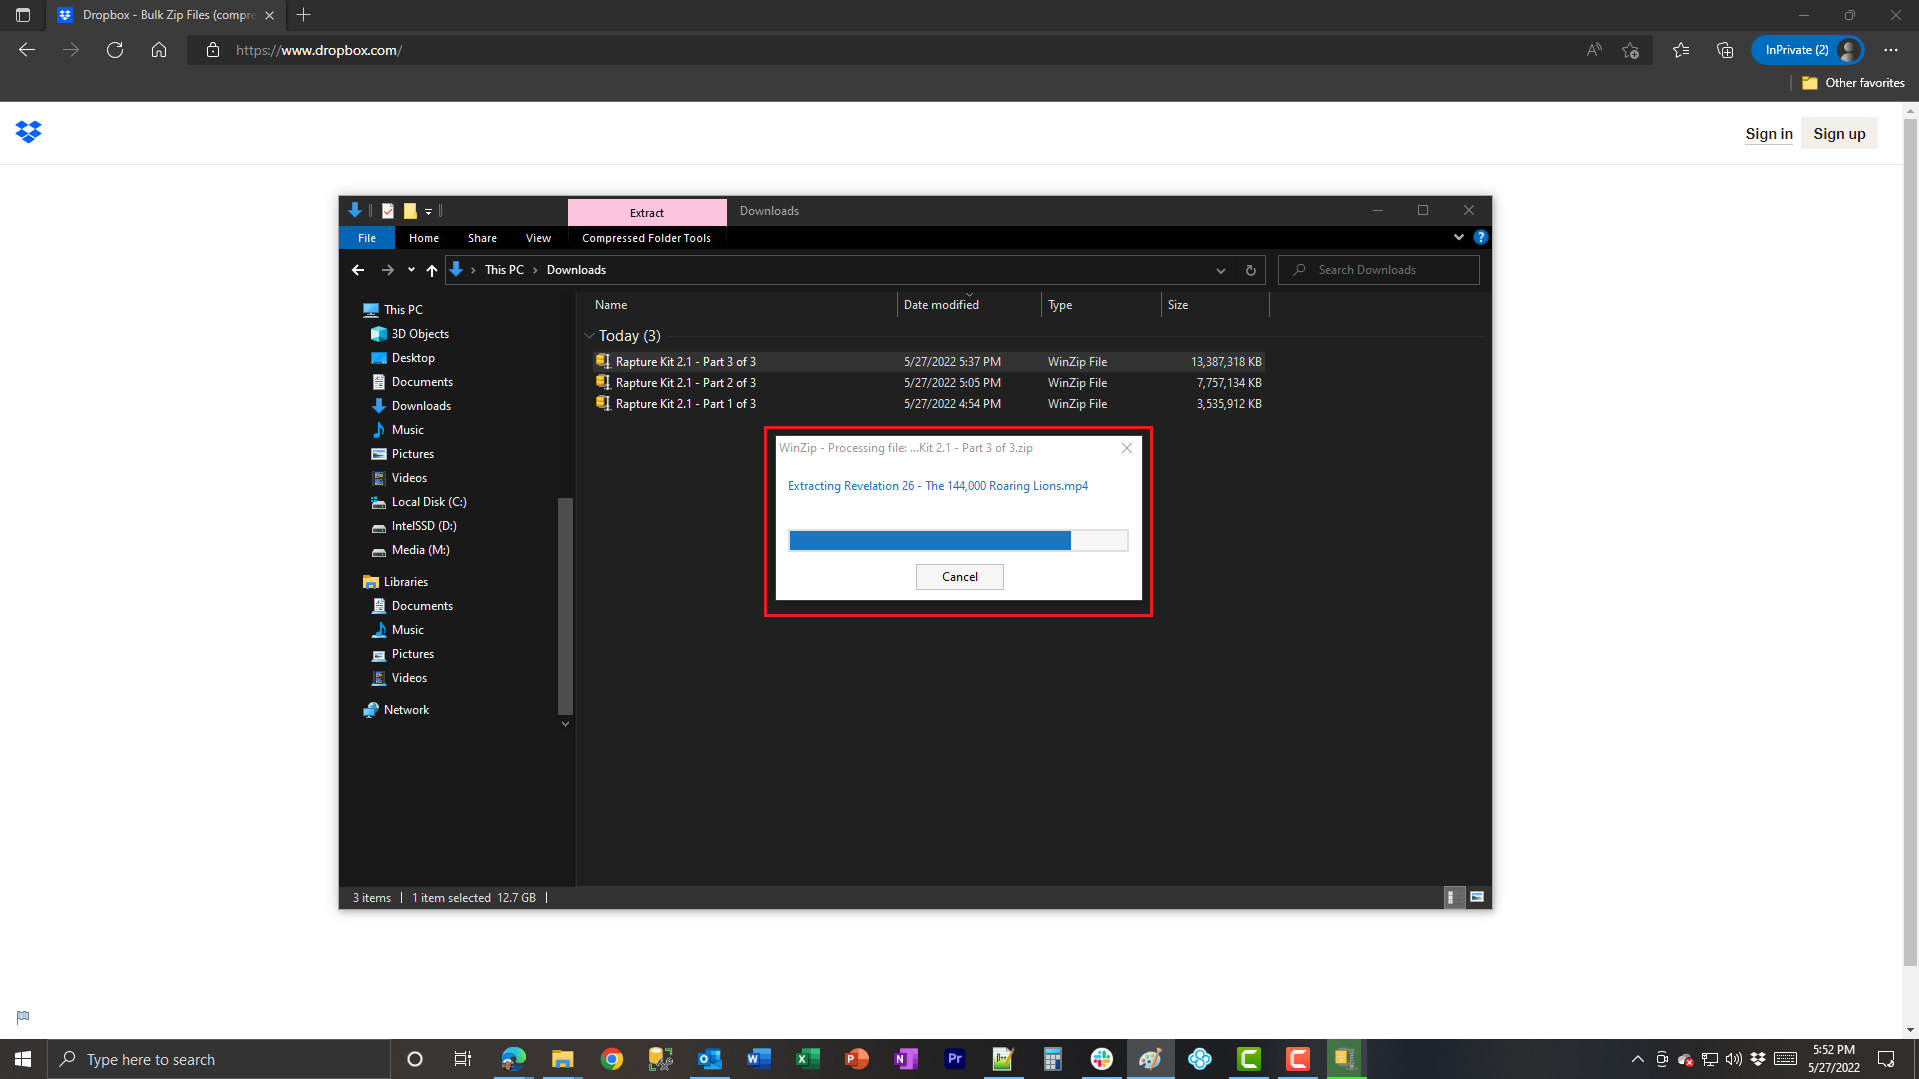
On the left (source) screen, right click on “Section 02 – First things first” and choose “WinZip” then “Unzip to…”. Although not illustrated, the PKZip dialog will pop-up where you can choose where to unzip the file. In this case, choose the Target “Section 02 – First things first” folder and click “Unzip” on the bottom right. Note the progress bar showing the decompression process and the right Target side will show new files as each is finished. |
 |
After the Zip file decompresses “Section 02 – First things first” you will see the resulting contents inside the target folder. You can close this window. |
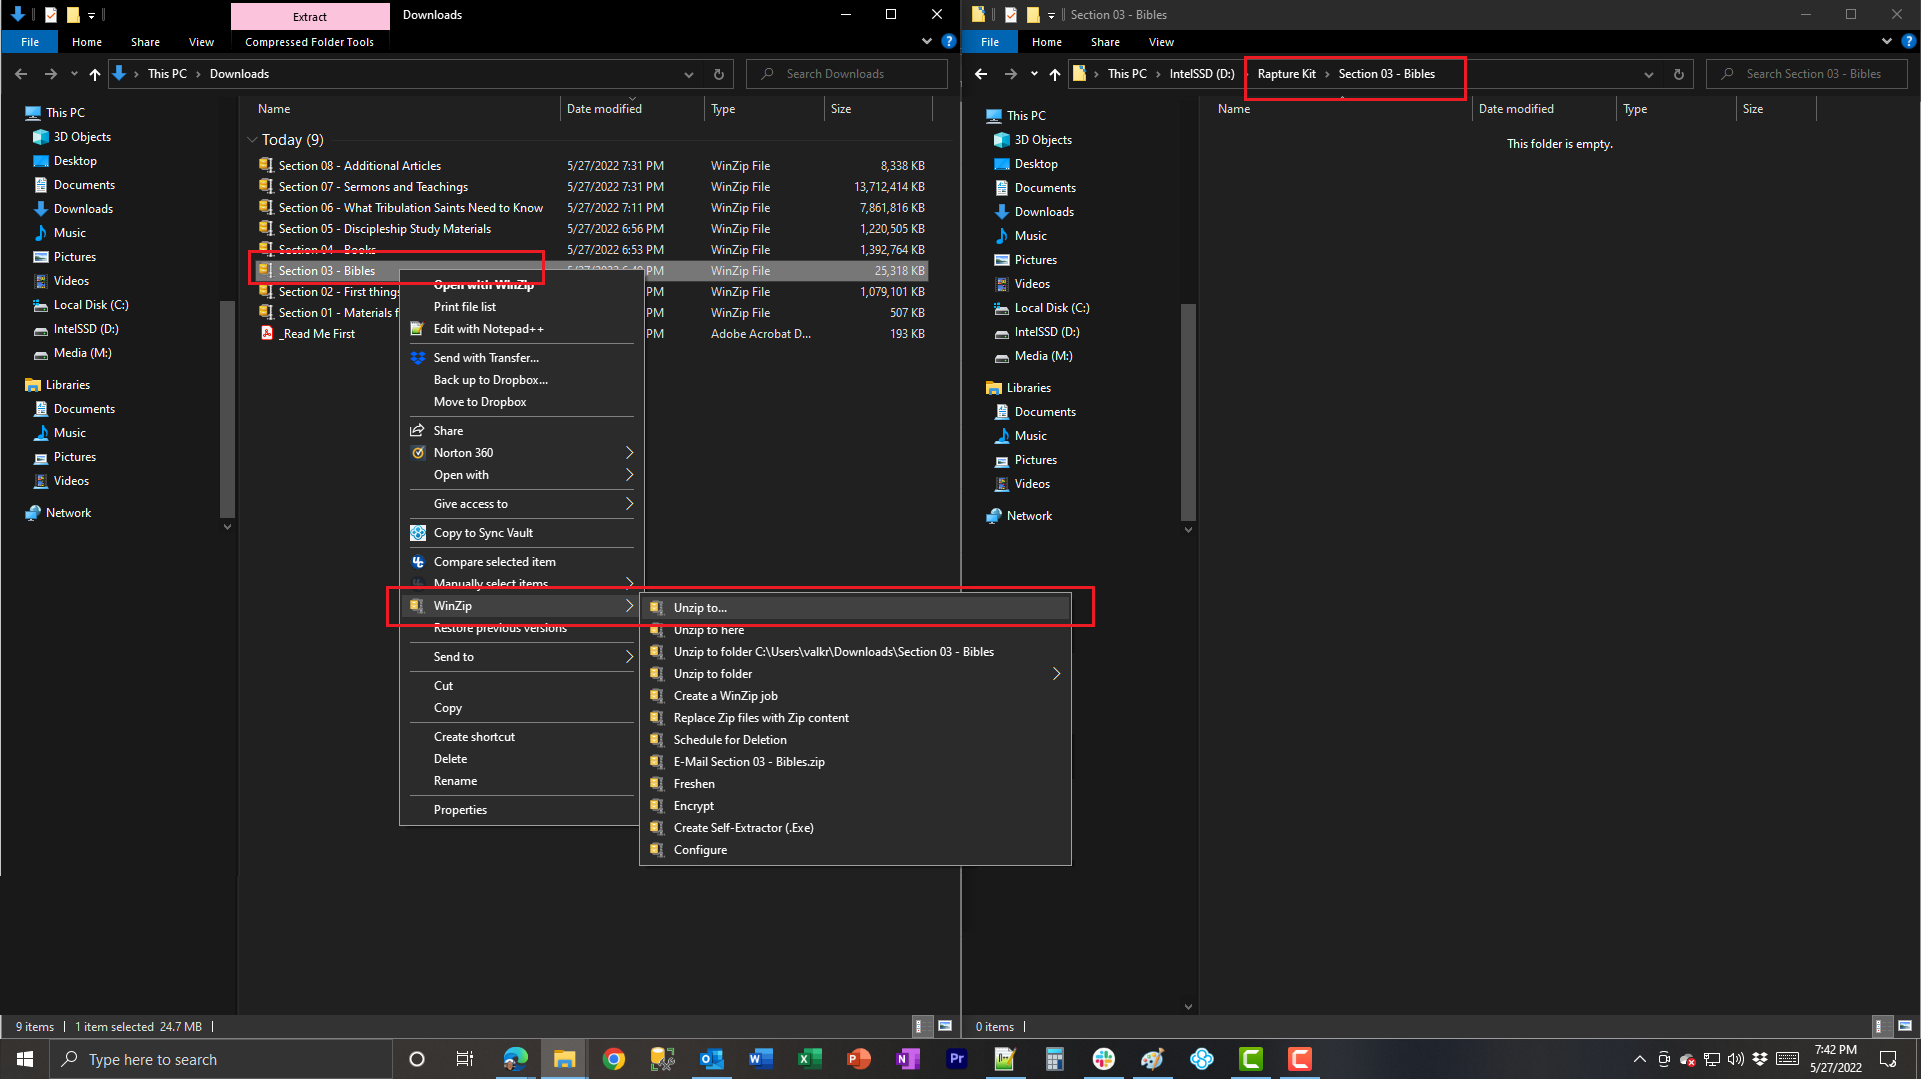 |
On the left (source) screen, right click on “Section 03 – Bibles” and choose “WinZip” then “Unzip to…”. Although not illustrated, the PKZip dialog will pop-up where you can choose where to unzip the file. In this case, choose the Target “Section 03 – Bibles” folder and click “Unzip” on the bottom right. |
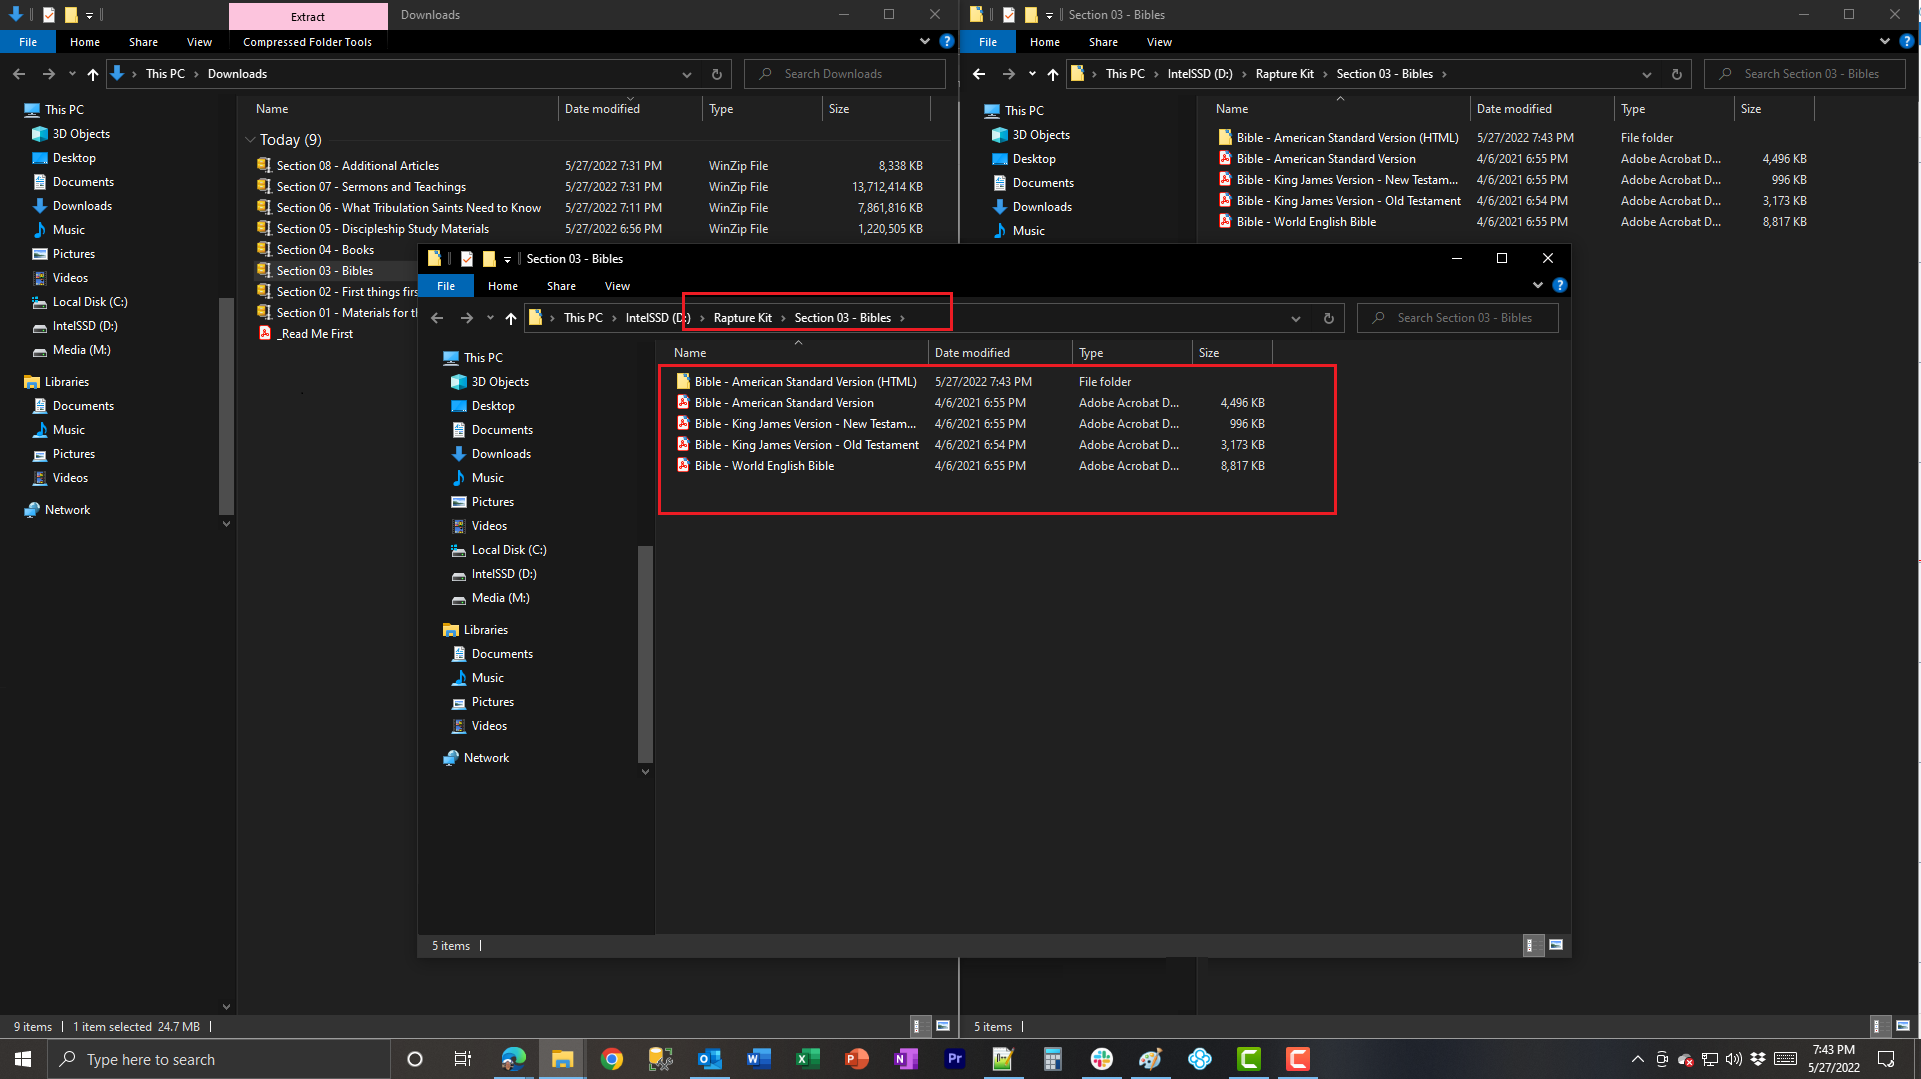 |
After the Zip file decompresses “Section 03 – Bibles” you will see the resulting contents inside the target folder. You can close this window. |
 |
On the left (source) screen, right click on “Section 04 – Books” and choose “WinZip” then “Unzip to…”. Although not illustrated, the PKZip dialog will pop-up where you can choose where to unzip the file. In this case, choose the Target “Section 04 – Books” folder and click “Unzip” on the bottom right. |
 |
After the Zip file decompresses “Section 04 – Books” you will see the resulting contents inside the target folder. You can close this window. |
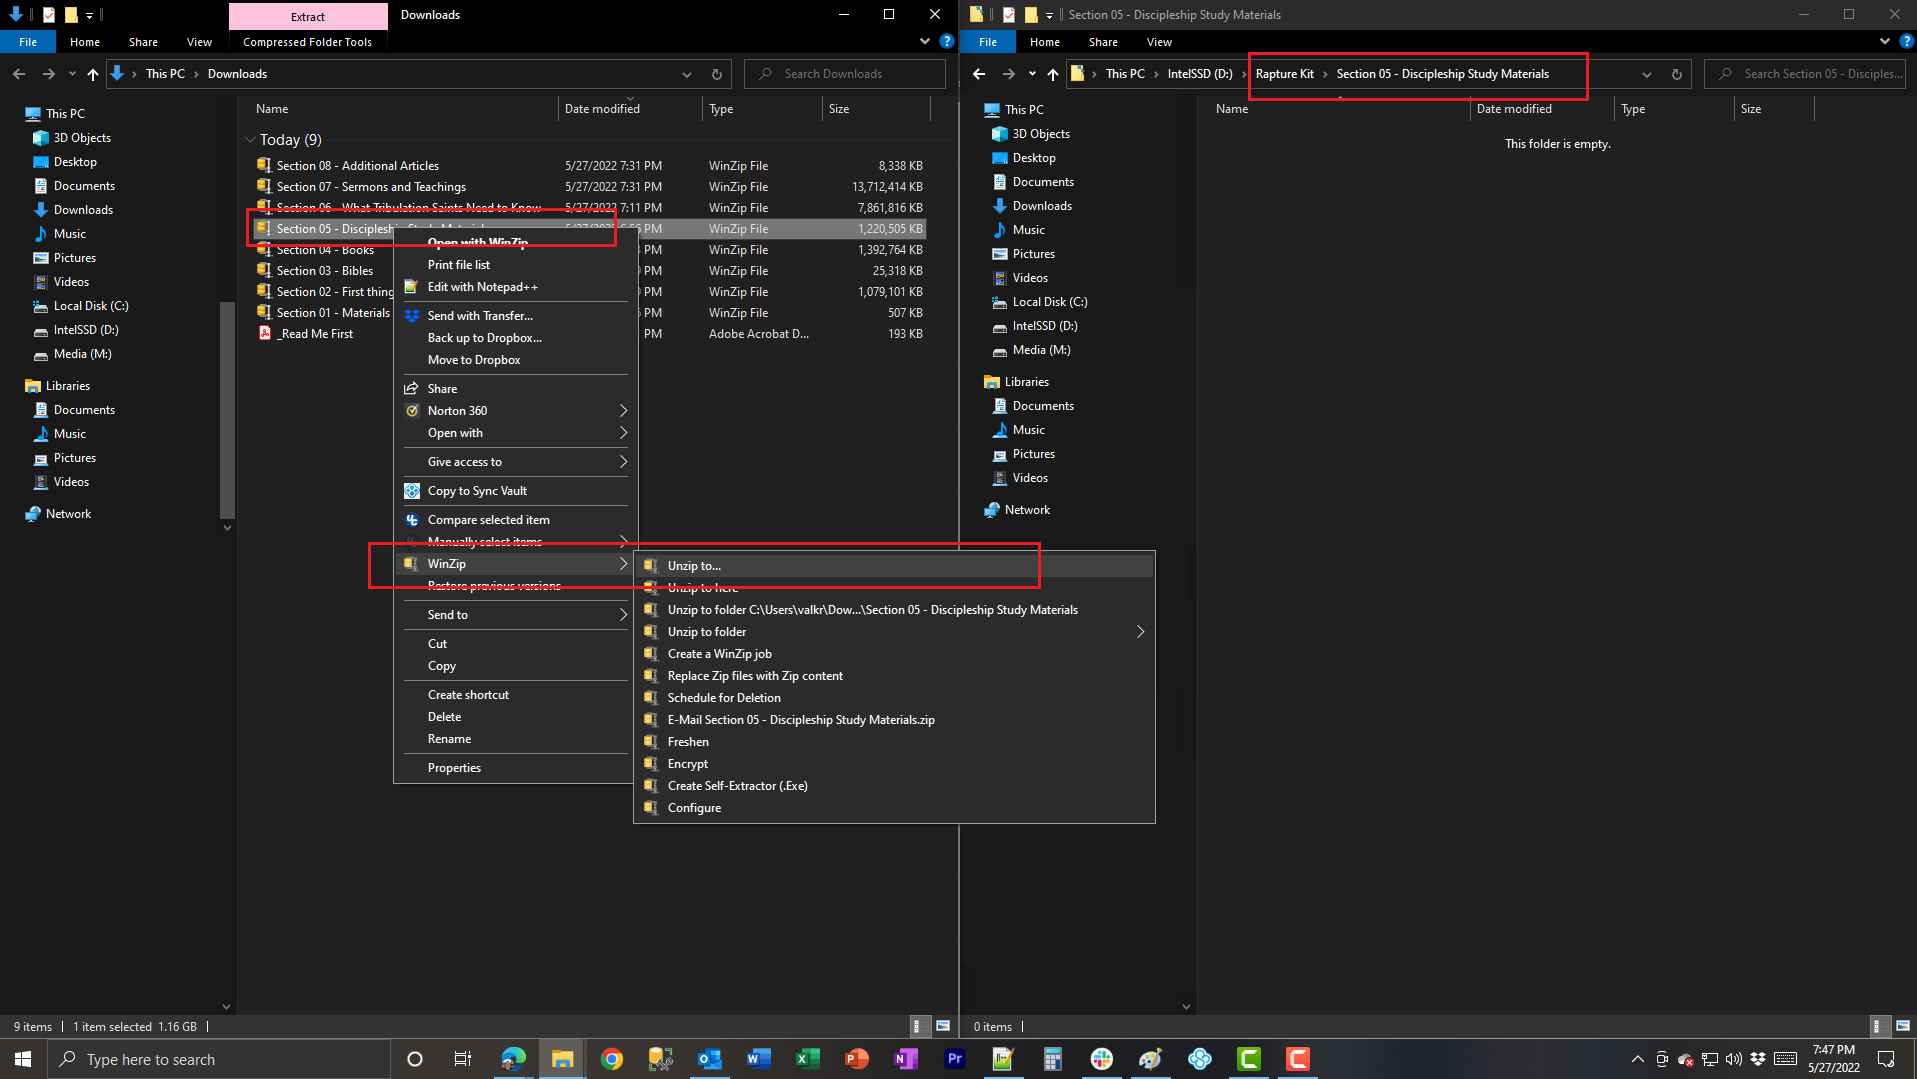 |
On the left (source) screen, right click on “Section 05 – Discipleship Study Materials” and choose “WinZip” then “Unzip to…”. Although not illustrated, the PKZip dialog will pop-up where you can choose where to unzip the file. In this case, choose the Target “Section 05 – Discipleship Study Materials” folder and click “Unzip” on the bottom right. |
 |
After the Zip file decompresses “Section 05 – Discipleship Study Materials” you will see the resulting contents inside the target folder. You can close this window. |
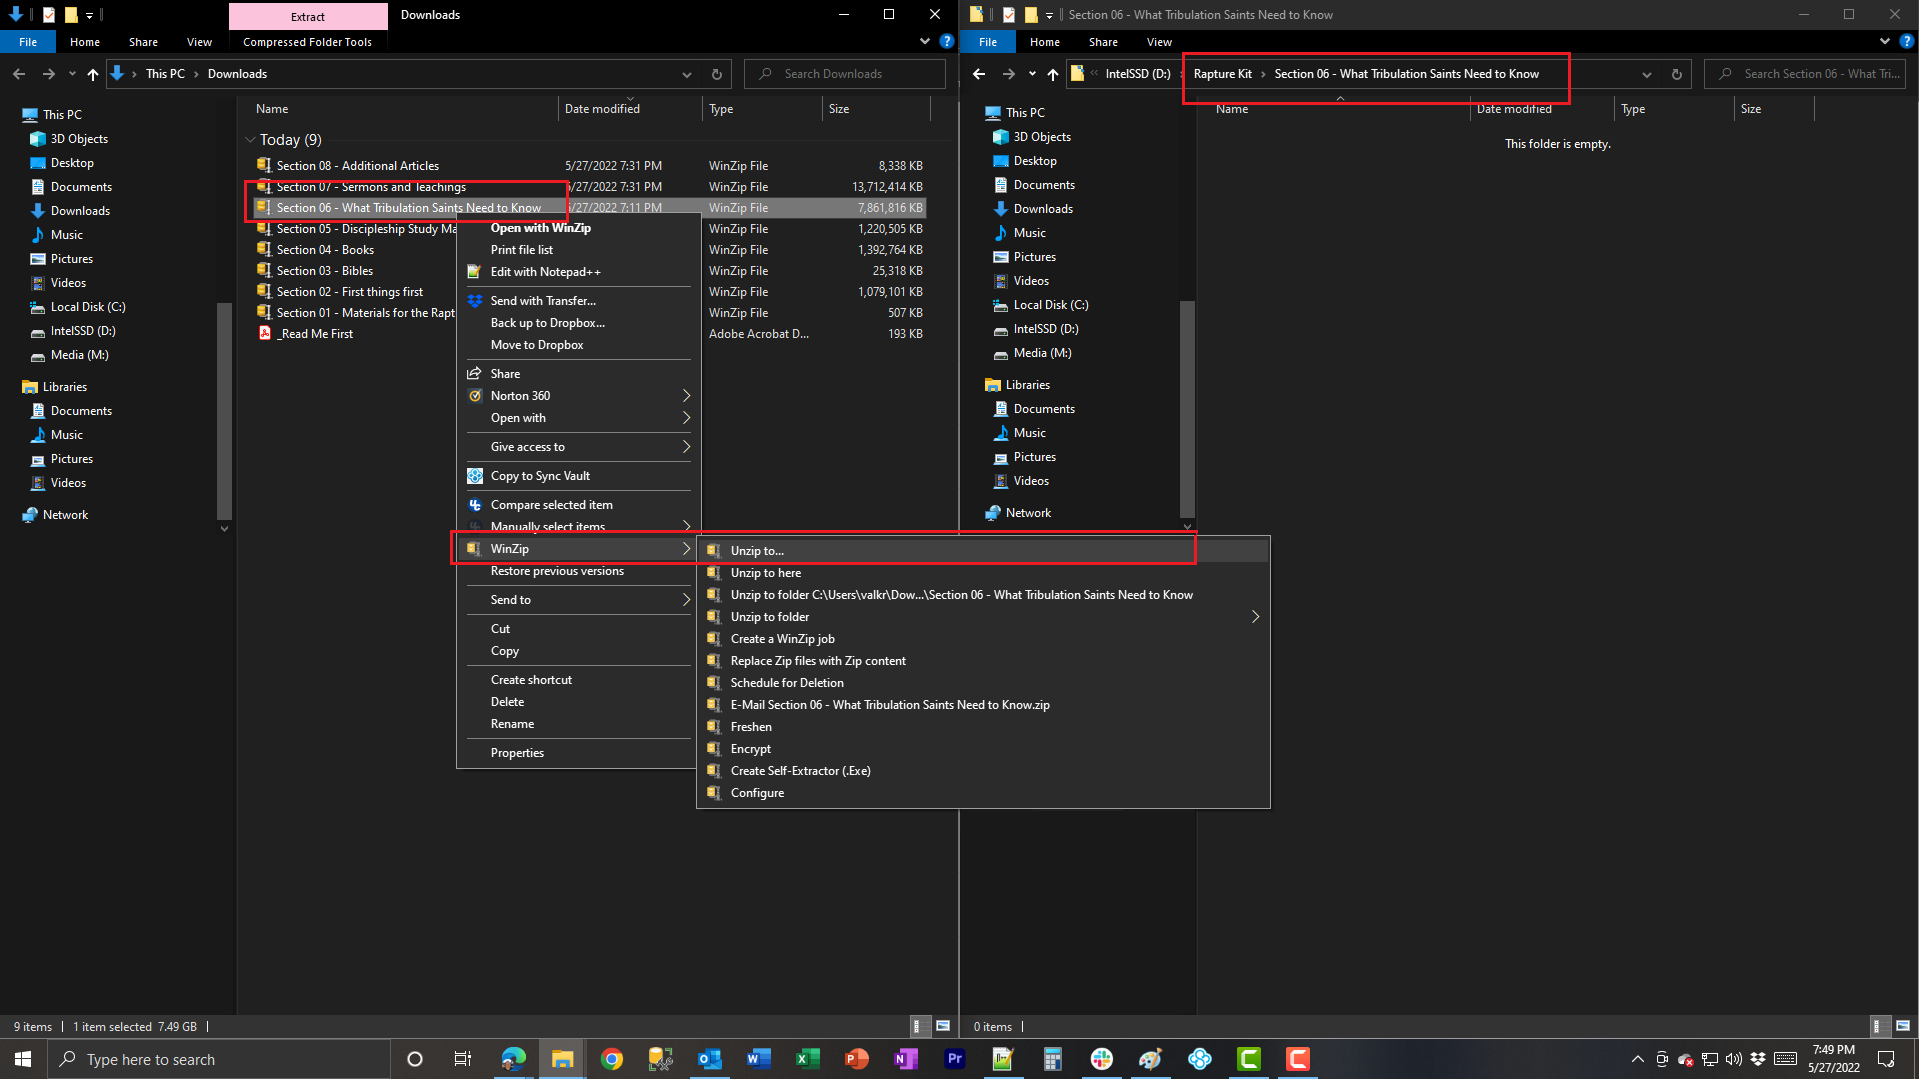 |
On the left (source) screen, right click on “Section 06 – What Tribulation Saints Need to Know” and choose “WinZip” then “Unzip to…”. Although not illustrated, the PKZip dialog will pop-up where you can choose where to unzip the file. In this case, choose the Target “Section 06 – What Tribulation Saints Need to Know” folder and click “Unzip” on the bottom right. |
 |
After the Zip file decompresses “Section 06 – What Tribulation Saints Need to Know” you will see the resulting contents inside the target folder. Note that you may or may not see a preview thumbnail of the video. Don’t worry if you do not. You can close this window. |
 |
On the left (source) screen, right click on “Section 07 – Sermons and Teachings” and choose “WinZip” then “Unzip to…”. Although not illustrated, the PKZip dialog will pop-up where you can choose where to unzip the file. In this case, choose the Target “Section 07 – Sermons and Teachings” folder and click “Unzip” on the bottom right. |
 |
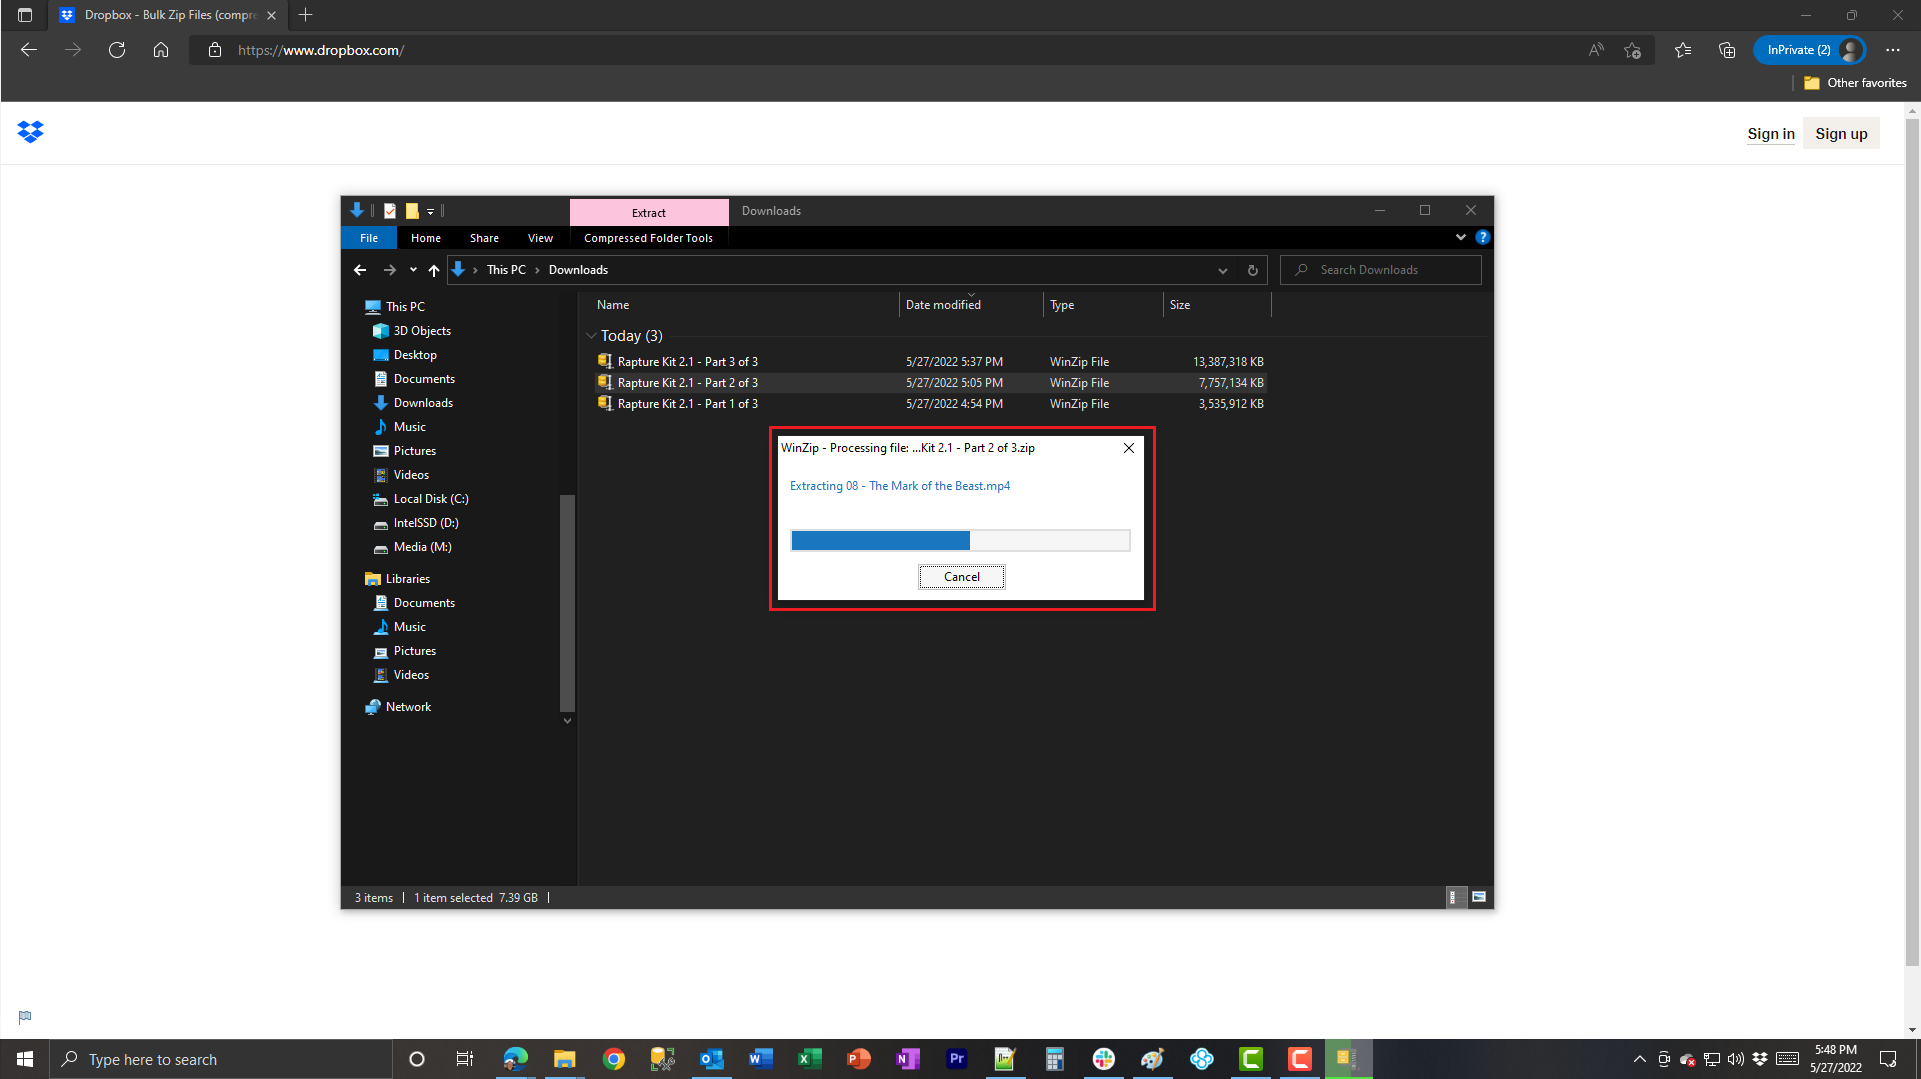
After the Zip file decompresses “Section 07 – Sermons and Teachings” you will see the resulting contents inside the target folder. Note the progress bar…which you may see moving more slowly than the other folders. This is because there is a lot of content being processed. You can close this window when it’s completed. |
 |
On the left (source) screen, right click on “Section 08 – Additional Articles” and choose “WinZip” then “Unzip to…”. Although not illustrated, the PKZip dialog will pop-up where you can choose where to unzip the file. In this case, choose the Target “Section 08 – Additional Articles” folder and click “Unzip” on the bottom right. |
 |
After the Zip file decompresses “Section 08 – Additional Articles” you will see the resulting contents inside the target folder. Note the progress bar. You can close this window. |
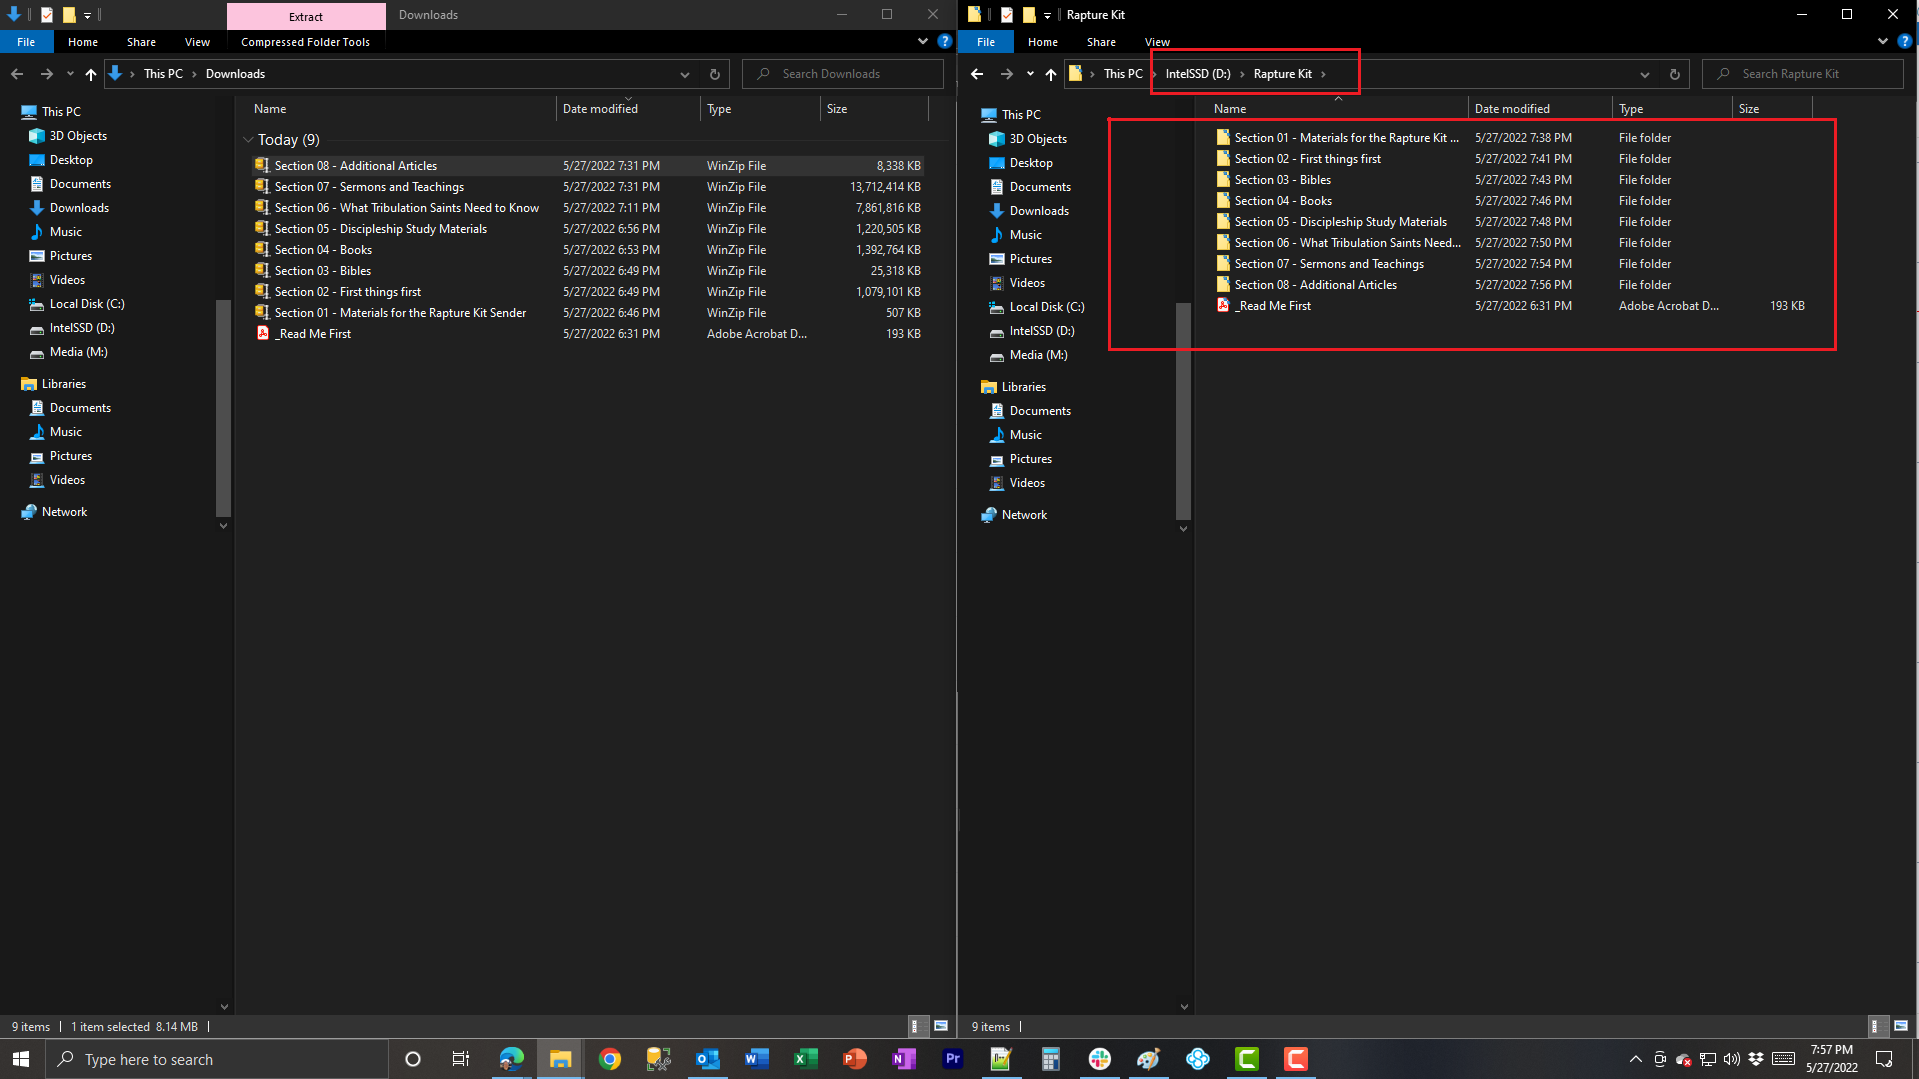 |
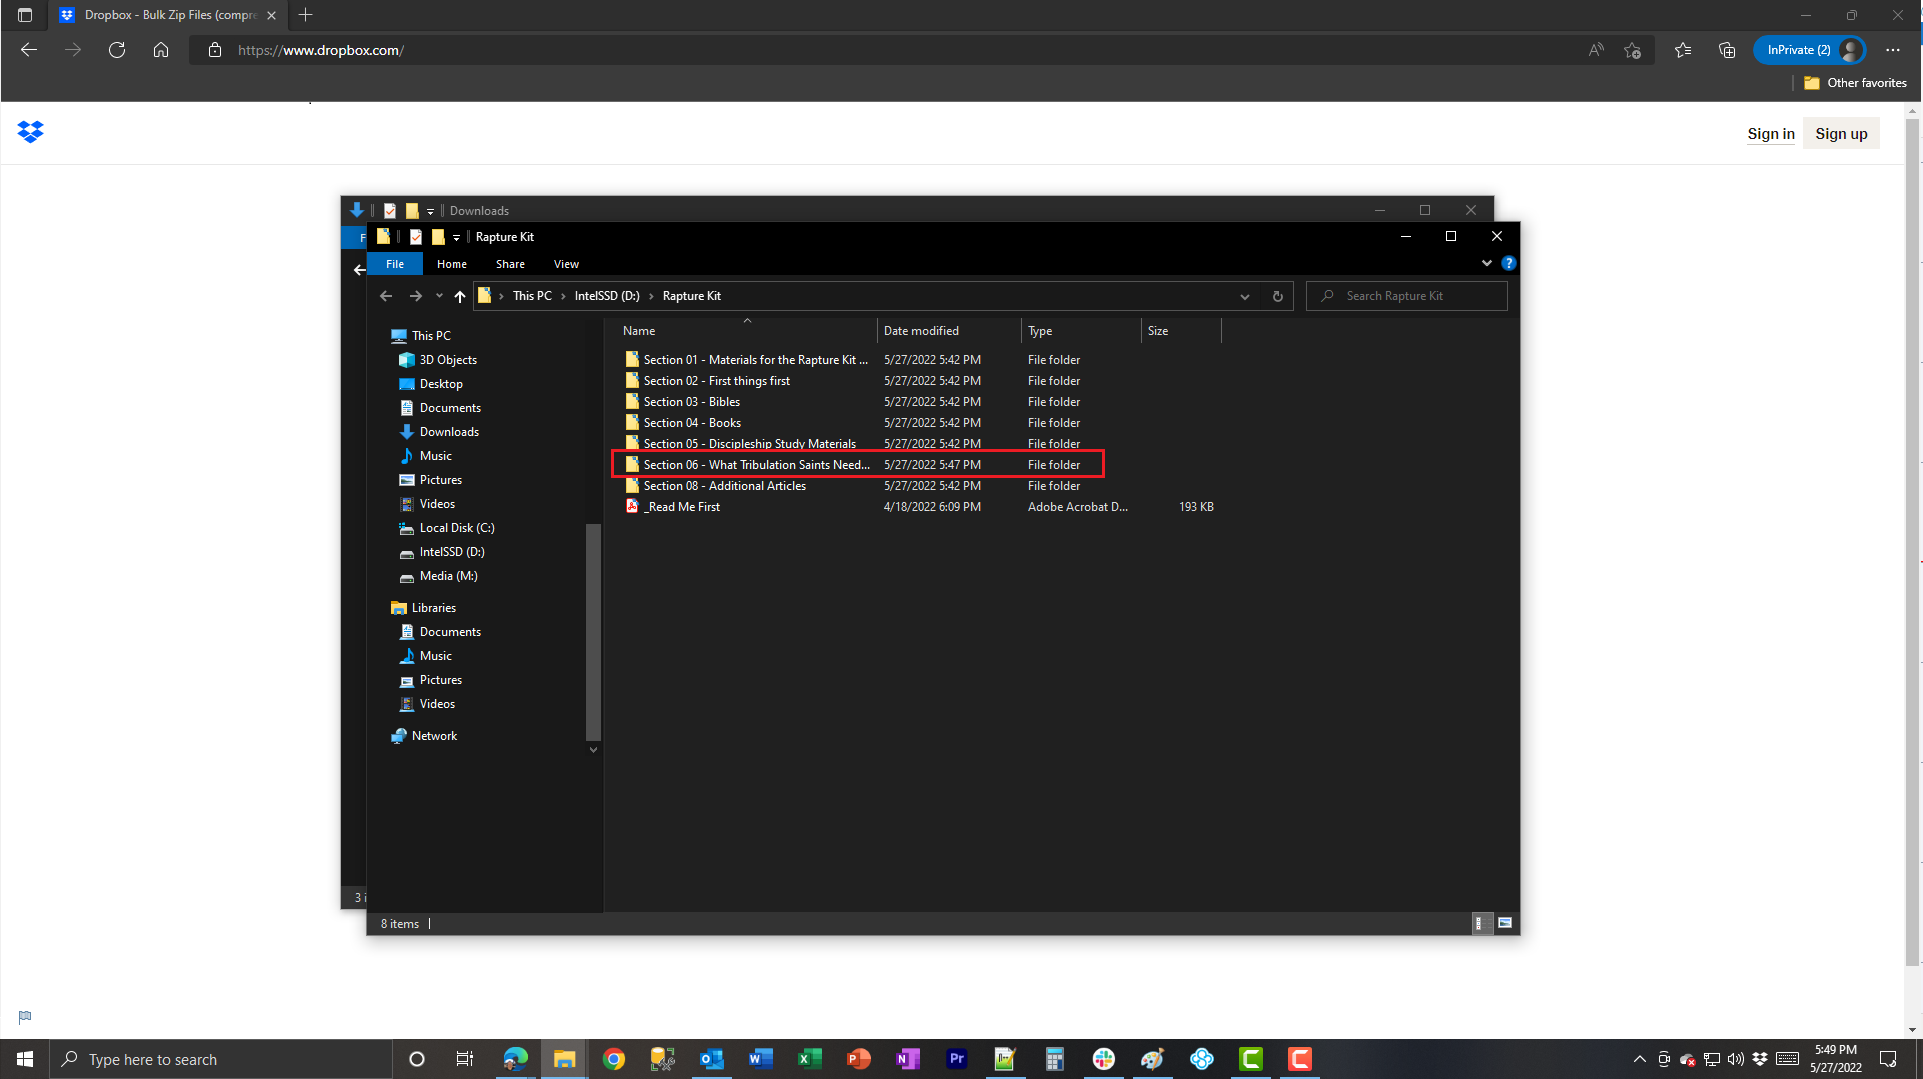
On the right Target side of your screen, you should now see the completed Rapture Kit contents! |
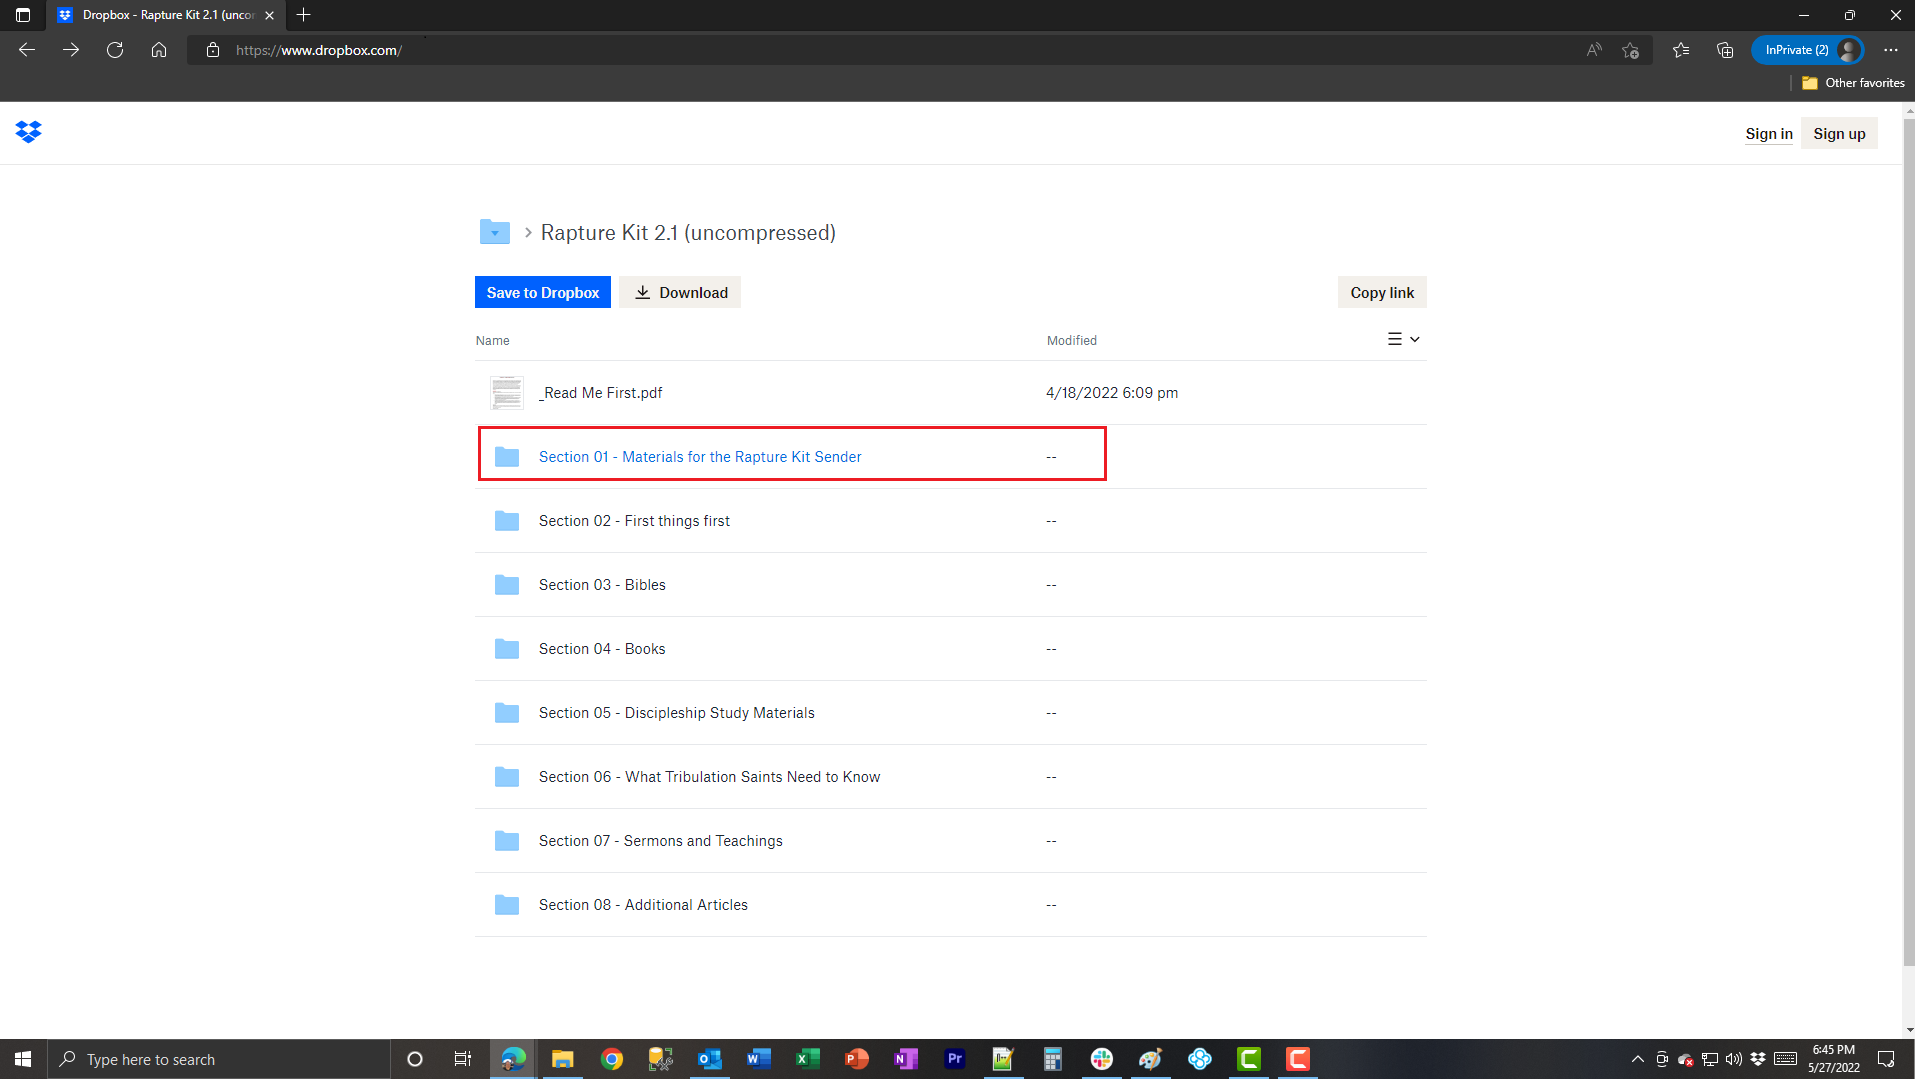 Back in Dropbox, click on “Section 01 – Materials for the Rapture Kit Sender”.